Introduction
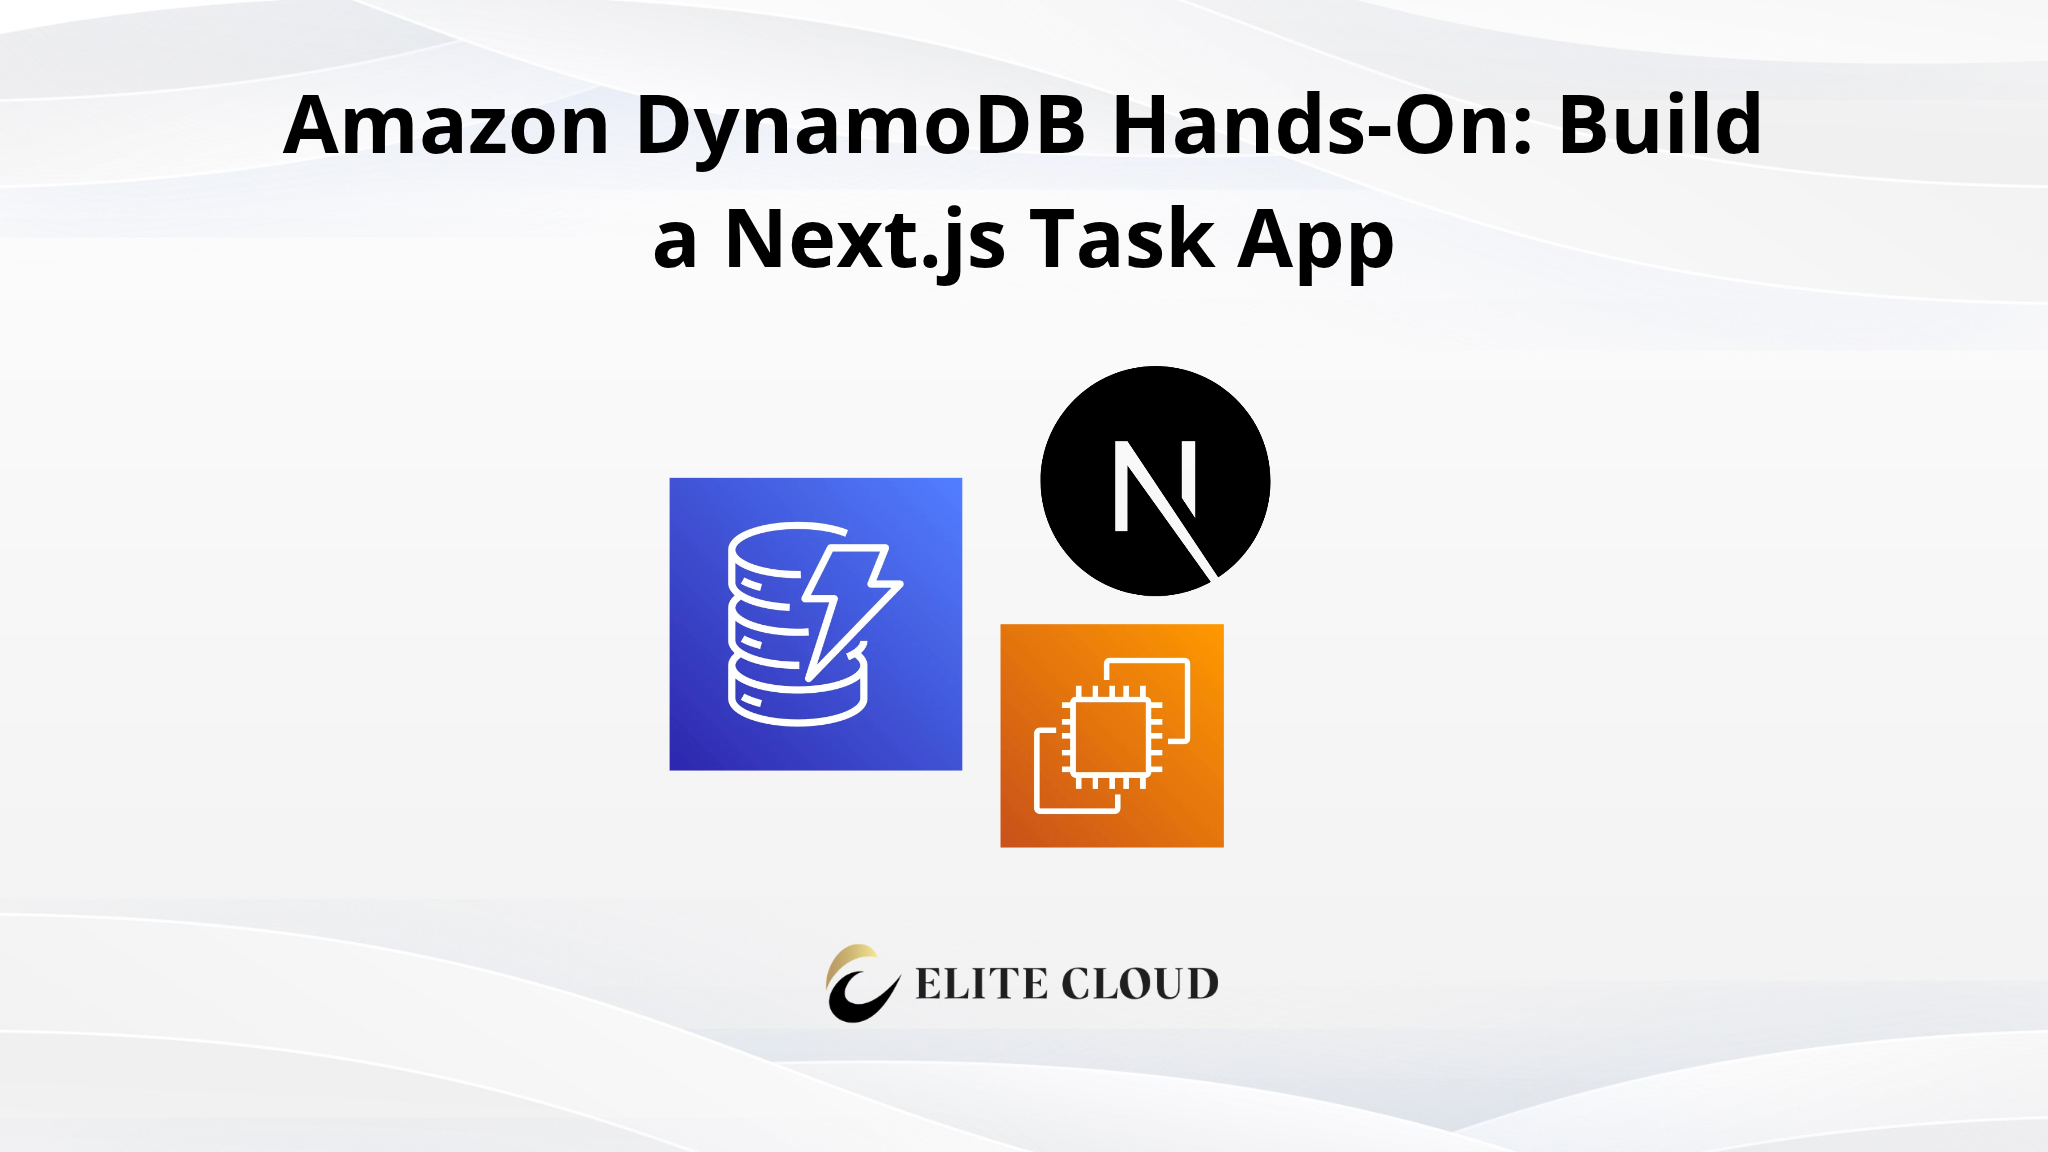
In this article, we will learn how to use Amazon DynamoDB. Amazon DynamoDB is a NoSQL serverless database that scales automatically. It’s fully managed, with no server to run; just create a table and start reading and writing.
We will create a DynamoDB table in the AWS Console and connect a small Next.js task app to it. The app lists, adds, completes, and deletes tasks, and every action is a real DynamoDB call.
Here is some fundamental keyword knowledge you need:
| Term | Meaning | In our app |
| Table | Where items are stored | Tasks |
| Item | One record, like a row | One task |
| Partition key | Groups items; required | userId |
| Sort key | Orders items inside a group | taskId |
| Query | Read items by key (fast, cheap) | List a user’s tasks |
| Scan | Read the whole table (slow, costly) | Not used |
Architecture
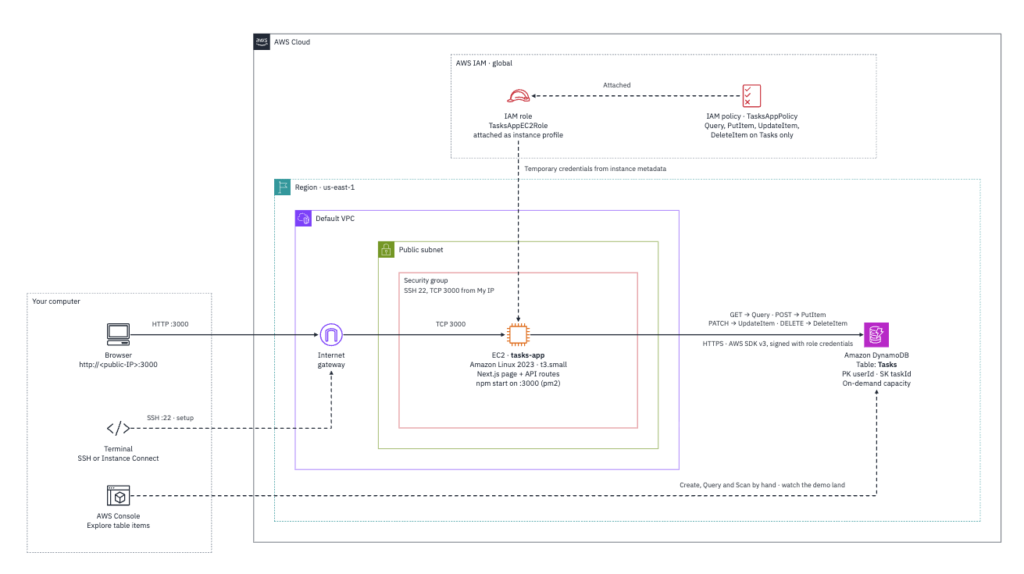
Here, we access the DynamoDB using an IAM role, so theres no credential to store.
Prerequisites
- An AWS account with Console access.
- Node.js 20 or newer.
- One Region used throughout. This guide uses us-east-1.
Step 1: Create the table
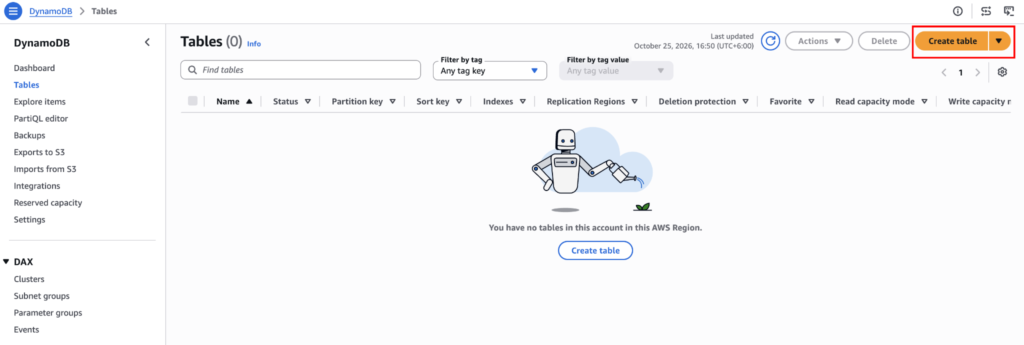
Open the DynamoDB console and make sure the Region selected is us-east-1. Now, in Tables, click on “Create table.”
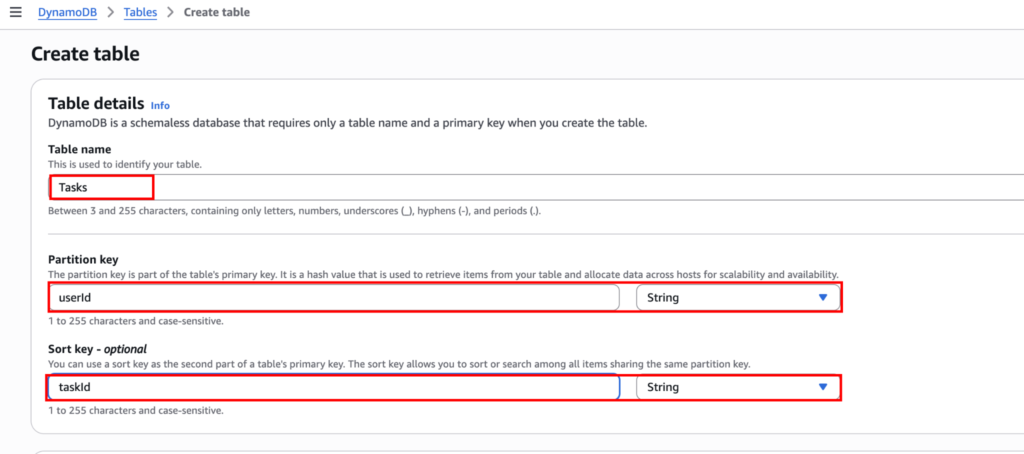
Name the table “Tasks”; for the partition key, use “userId”; for the sort key, use “taskId”; make sure both are set to String.
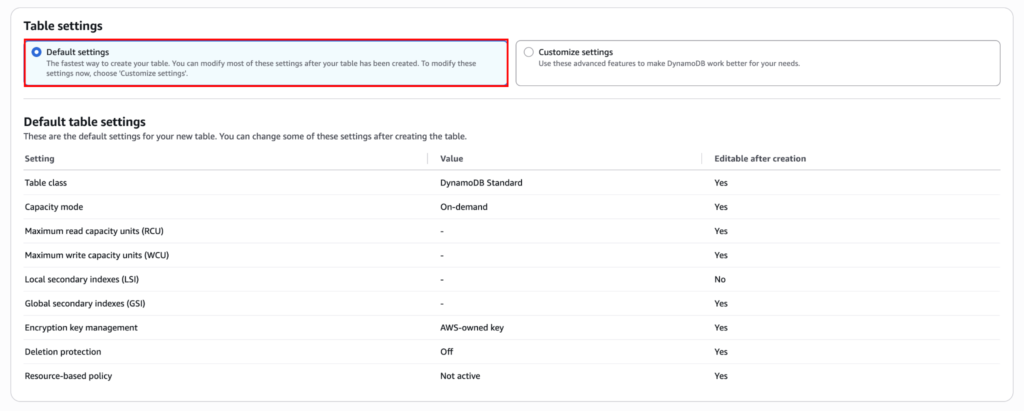
Leave the table at the default setting, and choose “Create table”.
Now wait for the status to be active.

Why these keys? All of a user’s tasks share one userId, so the app fetches them with a single Query. The app makes taskId start with a timestamp (1791050112418-6d513f2b), so tasks come back sorted by creation time.
Step 2: Add and query items in the Console
Lets first test the table ourselves before connecting it to the application. So we know how it’s gonna behave.
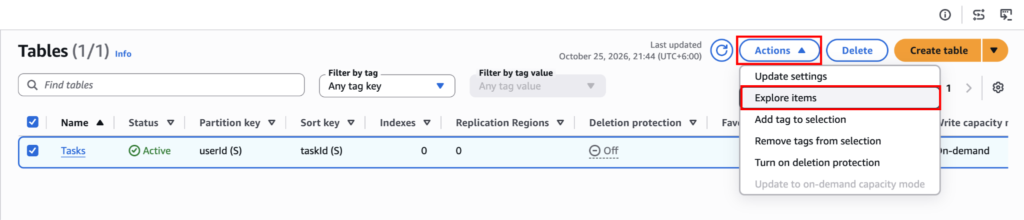
Select the “Tasks” table and click on Actions -> Explore items.
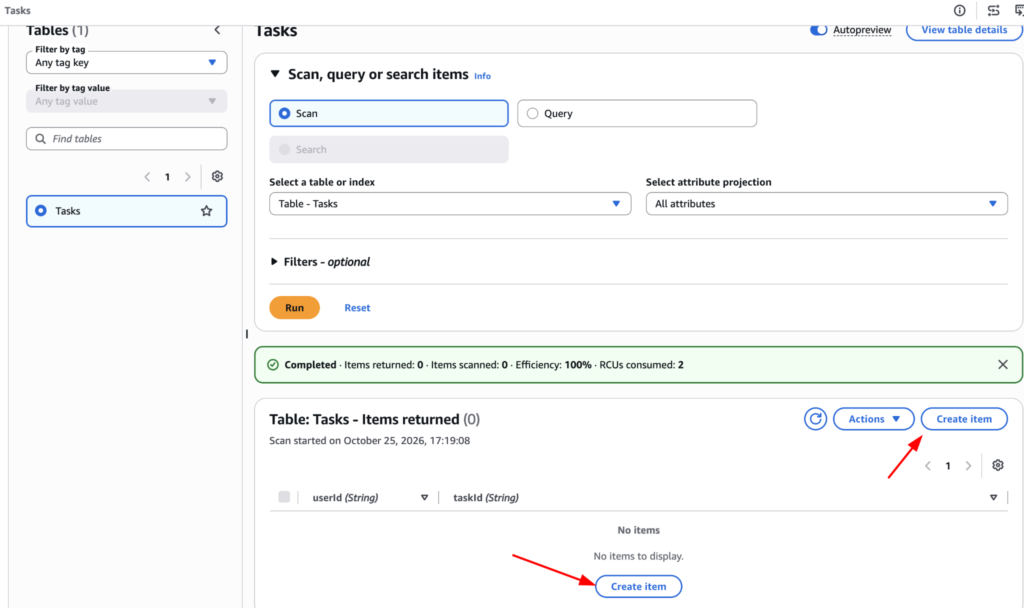
Now click “Create item”.
Navigate to “JSON view” and paste the content below exactly. Make sure the “View DynamoDB JSON” is toggled.
{

  "userId": { "S": "alice" },

  "taskId": { "S": "1700000000000-test" },

  "title":  { "S": "Created from the console" },

  "done":   { "BOOL": false }

}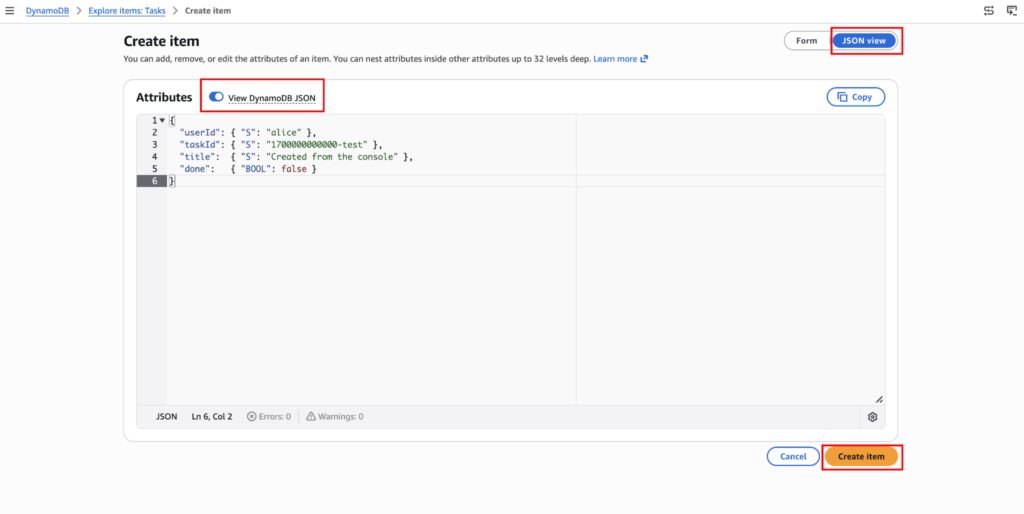
In DynamoDB JSON, every value is wrapped in its type (S = String, N = Number, BOOL = Boolean). The console expects this format while the toggle is on, so plain values like “userId”: “alice” fail with an error such as Unsupported type. The app never sees this format, because the SDK’s Document client converts it for you.
You can also see how it looks by switching back to “Form” mode.
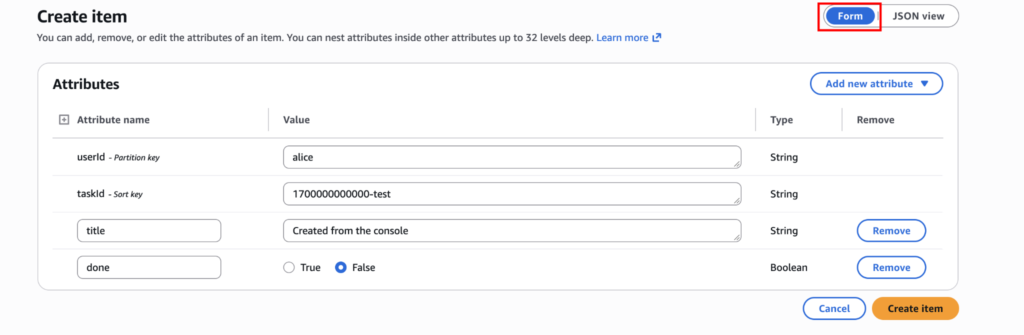
Once you are done looking, click on “Create item”.
Now, back to the “Explore items”, choose “Query”, and in “userId” write “alice”, as this was written in our data that we just created, and click “Run”.
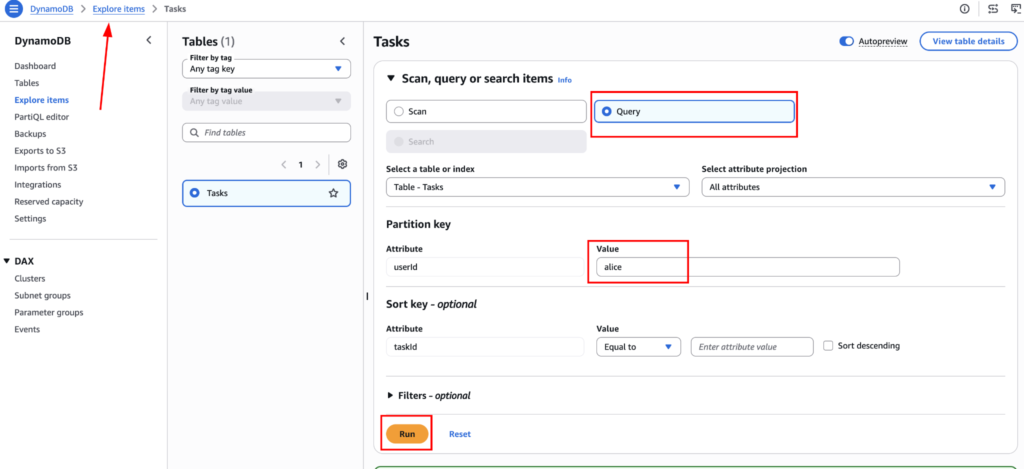
This will return the data we just put.
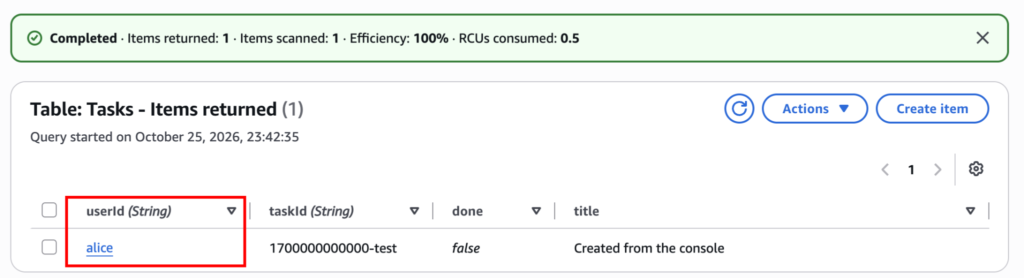
Another thing you should learn is that selecting “Scan” and running will return you every item in the table. This is good for small amounts of items, but if you have millions of items in a table, this can become very expensive. So be careful about this in a production system.
Step 3: Create an IAM role and launch EC2
Now that the DynamoDB part is done, let’s set up the IAM permission. The app needs its own credentials for accessing the “Tasks” table.
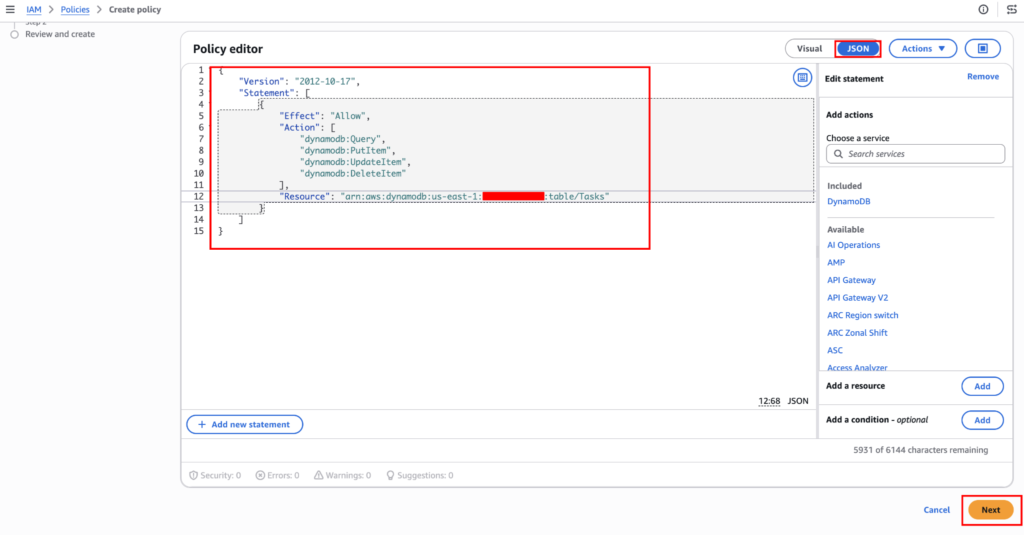
Now go to IAM -> Policies -> Create policy -> JSON. Paste the policy below; make sure to replace the ARN in Resources.
{

  "Version": "2012-10-17",

  "Statement": [

    {

      "Effect": "Allow",

      "Action": [

        "dynamodb:Query",

        "dynamodb:PutItem",

        "dynamodb:UpdateItem",

        "dynamodb:DeleteItem"

      ],

      "Resource": "arn:aws:dynamodb:us-east-1:123456789012:table/Tasks"

    }

  ]

}
Name the policy “TasksAppPolicy” and create it.
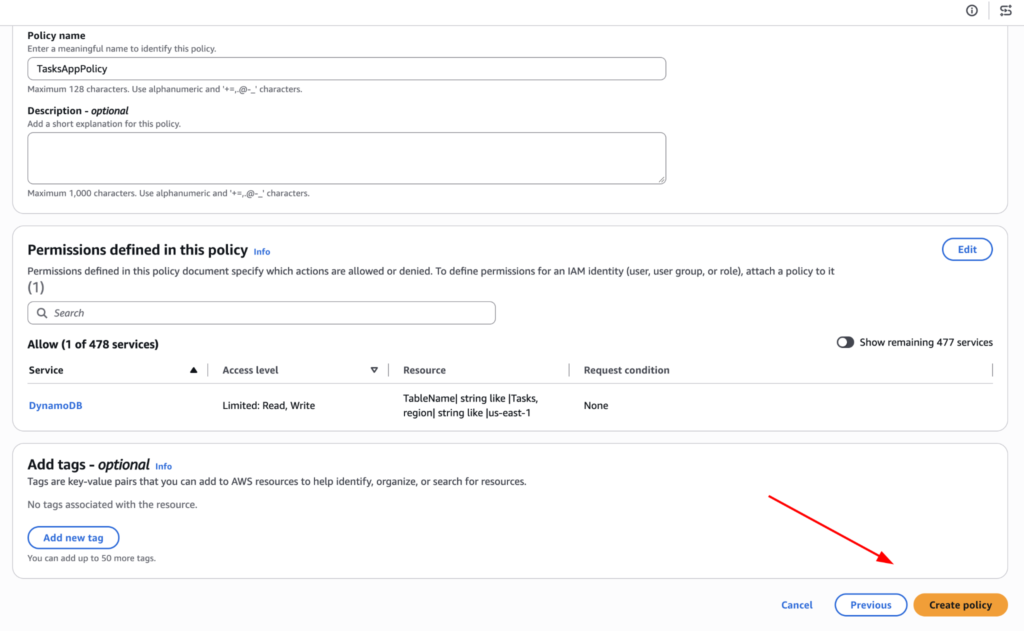
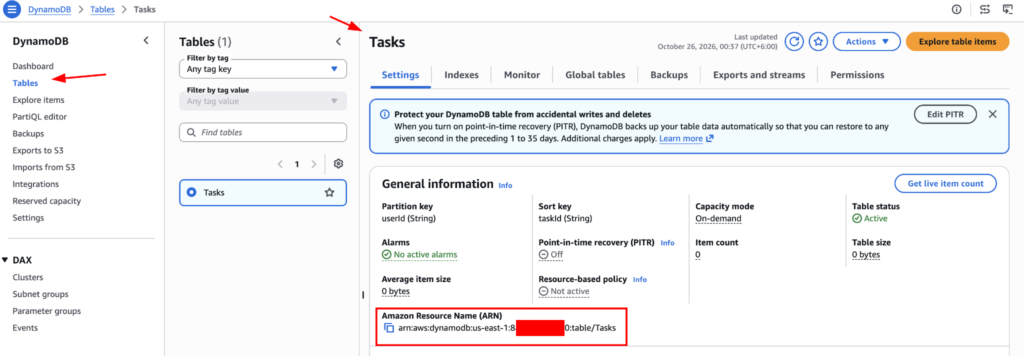
You can find the ARN in the Table “Settings”.
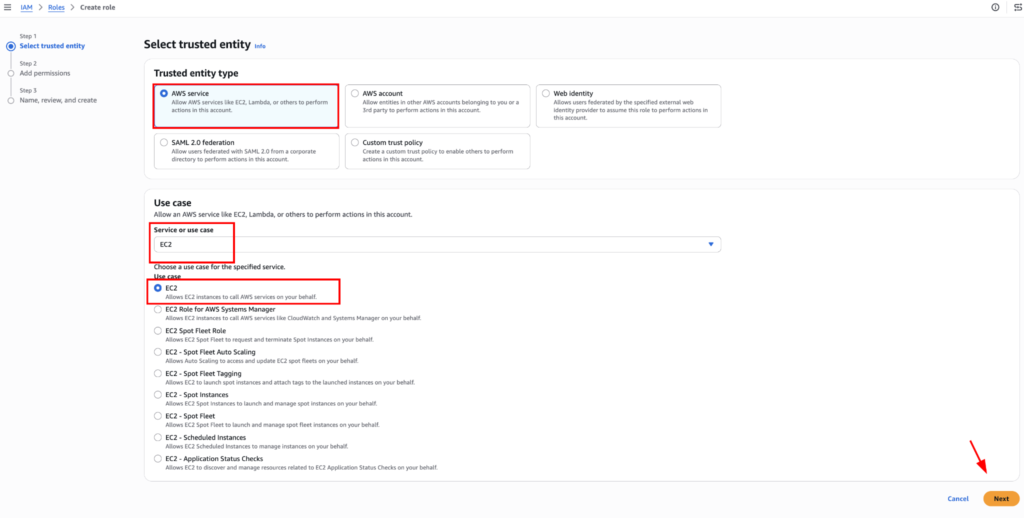
Now we will create an IAM Role; go to IAM -> Role -> Create role. Then select “AWS service” as the trusted entity type, and in the use case, select “EC2”.
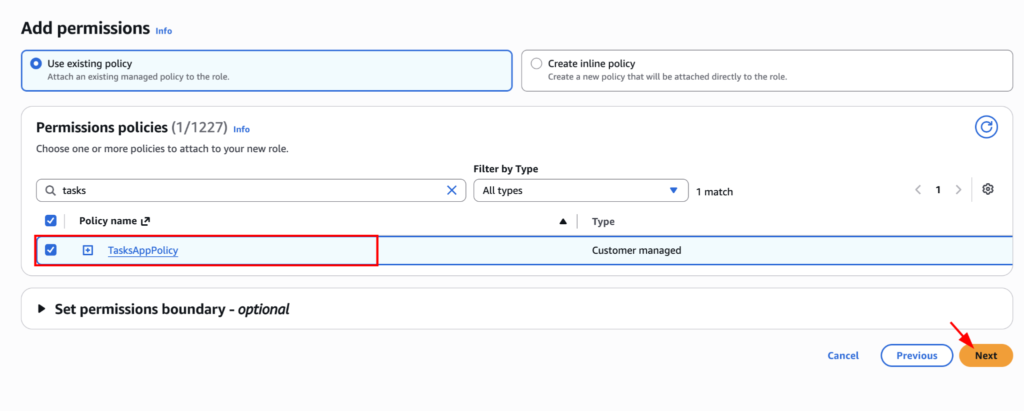
In the next step, select the “TasksApp Policy” and click “Next”.
Now name the role “TasksAppEC2Role” and click “Create role”.
Launch the instance with the role
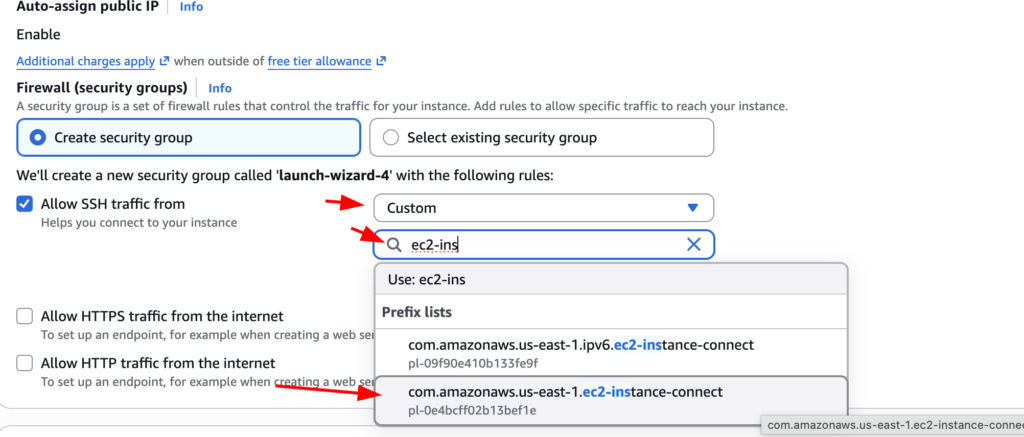
Now it’s time to create the instance and connect the IAM role. Go to EC2 Dashboard -> Instances -> Launch instances. Name the instance “tasks-app” and choose Amazon Linux 2023 as AMI; select the t3.small instance or larger. In the network section, select “Allow SSH” choose “Custom”, and select ec2-instance-connect. Also make sure to choose a key-pair or create a new one (not best for production).
Note: Also don’t forget to add the TCP port 3000. This will be used to access the Task App over the internet.
And increase the storage as per your requirement; in our case, 8 GB is gonna be sufficient.
Now click on “Advanced details” and IAM instance profile, select our created role, and launch the instance.
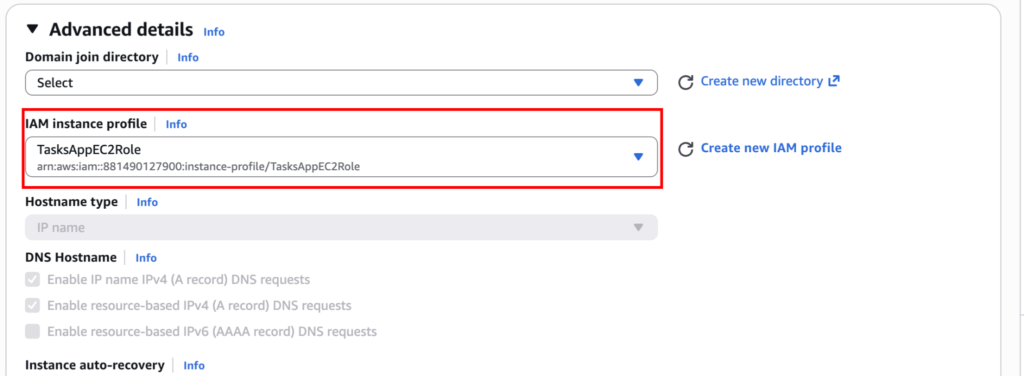
If you already have an instance? Select it → Actions → Security → Modify IAM role → TasksAppEC2Role.
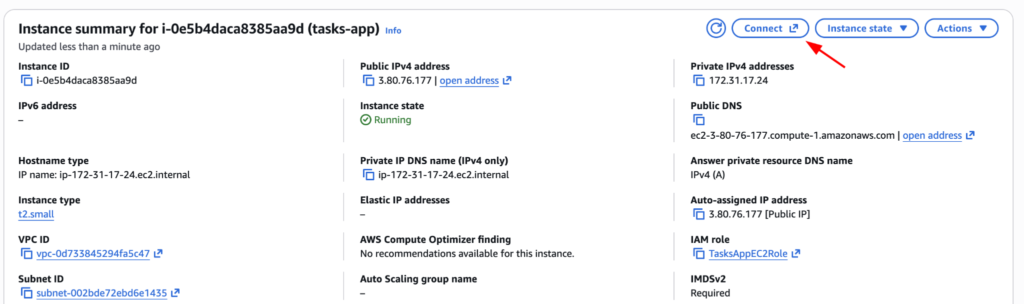
Once the instance is running, connect to the instance using Connect.
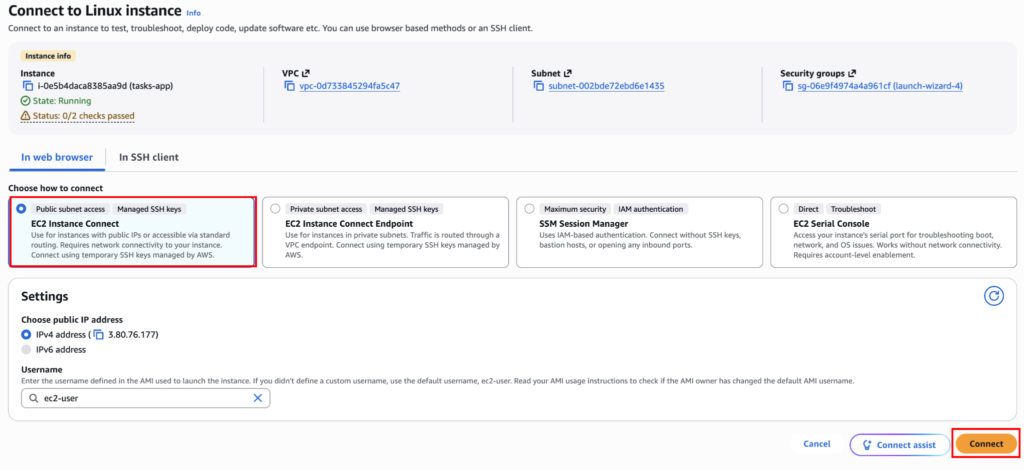
Then select “EC2 Instance Connect”.
Step 4: Build the Next.js app
Now install the necessary packages for our app.
curl -o- https://raw.githubusercontent.com/nvm-sh/nvm/v0.40.3/install.sh | bash

source ~/.bashrc

nvm install --lts

node -v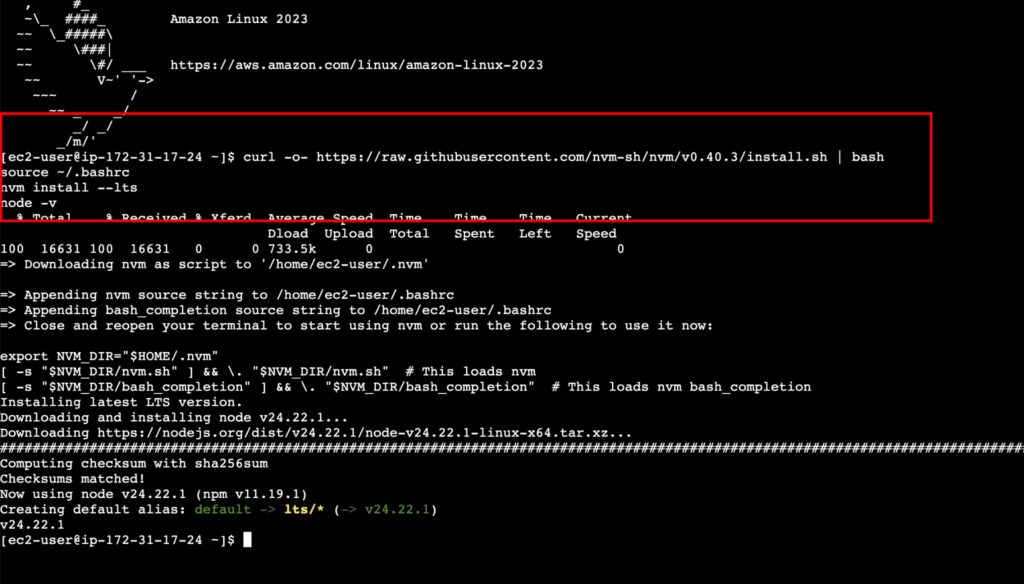
Also, check the role that’s attached to our instance with aws sts get-caller-identity.
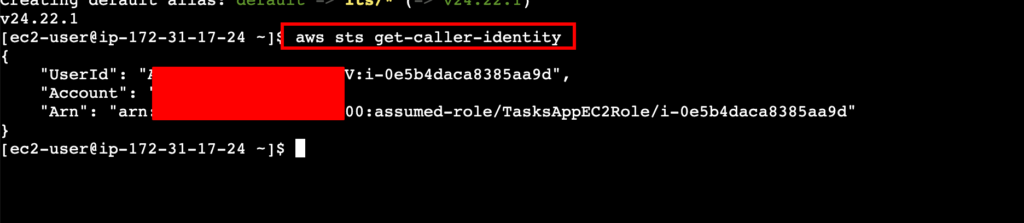
Now create the project and install the AWS SDK with the command.
npx create-next-app@latest tasks-app --yes
cd tasks-app
npm install @aws-sdk/client-dynamodb @aws-sdk/lib-dynamodb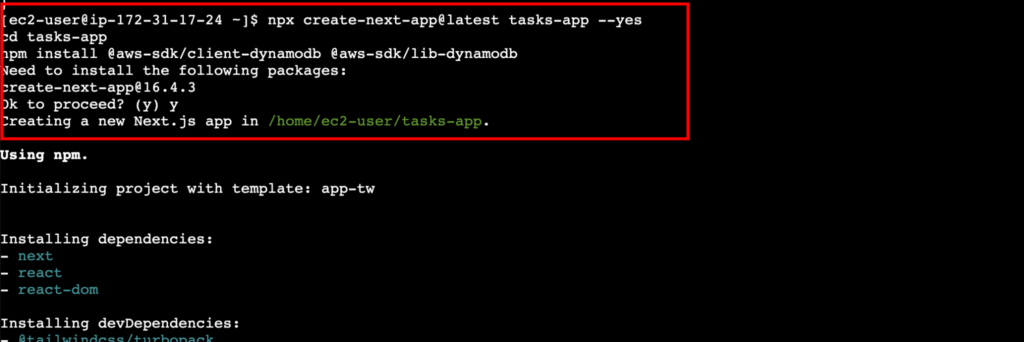
Add the settings in a new file .env.local, in the project root.
AWS_REGION=us-east-1

TABLE_NAME=Tasks
Here you will create four files. The lib and app/api folders do not exist yet, so create them first from the project root (the folder that contains app/):
mkdir -p lib "app/api/tasks/[taskId]"
If your project has a src/ folder (you chose it during setup), create them inside src/ instead: src/lib and src/app/api/…. The @/lib/dynamodb import works in both layouts.
| File | Role | DynamoDB call |
| lib/dynamodb.ts | Shared DynamoDB client | — |
| app/api/tasks/route.ts | List and add tasks | Query, PutItem |
| app/api/tasks/[taskId]/route.ts | Complete and delete a task | UpdateItem, DeleteItem |
| app/page.tsx | The web page | Calls the API routes |
–
1. lib/dynamodb.ts: connection
import { DynamoDBClient } from "@aws-sdk/client-dynamodb";
import { DynamoDBDocumentClient } from "@aws-sdk/lib-dynamodb";

// No keys in code: on EC2 the SDK gets temporary credentials from the instance role.
const client = new DynamoDBClient({ region: process.env.AWS_REGION });

// The Document client lets us use plain JS objects instead of {"S": "..."} types.
export const ddb = DynamoDBDocumentClient.from(client);
export const TABLE = process.env.TABLE_NAME ?? "Tasks";
That is the whole connection: no connection string, no pool, no keys. The SDK’s default credential chain asks the instance metadata service for the role’s temporary credentials, refreshes them before they expire, and signs each HTTPS request with them.
2. app/api/tasks/route.ts: list and add
import { NextRequest, NextResponse } from "next/server";
import { PutCommand, QueryCommand } from "@aws-sdk/lib-dynamodb";
import { randomUUID } from "crypto";
import { ddb, TABLE } from "@/lib/dynamodb";

// GET /api/tasks?userId=alice  -> Query one user's tasks, newest first
export async function GET(req: NextRequest) {
  const userId = req.nextUrl.searchParams.get("userId") ?? "alice";

  const result = await ddb.send(
    new QueryCommand({
      TableName: TABLE,
      KeyConditionExpression: "userId = :u",
      ExpressionAttributeValues: { ":u": userId },
      ScanIndexForward: false, // sort key descending = newest first
    })
  );

  return NextResponse.json(result.Items ?? []);
}

// POST /api/tasks  { userId, title }  -> PutItem
export async function POST(req: NextRequest) {
  const { userId, title } = await req.json();
  if (!userId || !title) {
    return NextResponse.json({ error: "userId and title are required" }, { status: 400 });
  }

  const item = {
    userId,
    taskId: `Date.now()-{randomUUID().slice(0, 8)}`, // time-first, so it sorts by creation
    title,
    done: false,
    createdAt: new Date().toISOString(),
  };

  await ddb.send(
    new PutCommand({
      TableName: TABLE,
      Item: item,
      ConditionExpression: "attribute_not_exists(taskId)", // never overwrite an existing task
    })
  );

  return NextResponse.json(item, { status: 201 });
}
3. app/api/tasks/[taskId]/route.ts: complete and delete
import { NextRequest, NextResponse } from "next/server";
import { ConditionalCheckFailedException } from "@aws-sdk/client-dynamodb";
import { DeleteCommand, UpdateCommand } from "@aws-sdk/lib-dynamodb";
import { ddb, TABLE } from "@/lib/dynamodb";

type Ctx = { params: Promise<{ taskId: string }> };

// PATCH /api/tasks/:taskId  { userId, done }  -> UpdateItem
export async function PATCH(req: NextRequest, { params }: Ctx) {
  const { taskId } = await params;
  const { userId, done } = await req.json();

  try {
    const result = await ddb.send(
      new UpdateCommand({
        TableName: TABLE,
        Key: { userId, taskId },
        UpdateExpression: "SET done = :d, updatedAt = :now",
        ConditionExpression: "attribute_exists(taskId)", // only update tasks that exist
        ExpressionAttributeValues: { ":d": done, ":now": new Date().toISOString() },
        ReturnValues: "ALL_NEW",
      })
    );
    return NextResponse.json(result.Attributes);
  } catch (err) {
    if (err instanceof ConditionalCheckFailedException) {
      return NextResponse.json({ error: "Task not found" }, { status: 404 });
    }
    throw err;
  }
}

// DELETE /api/tasks/:taskId?userId=alice  -> DeleteItem
export async function DELETE(req: NextRequest, { params }: Ctx) {
  const { taskId } = await params;
  const userId = req.nextUrl.searchParams.get("userId");

  await ddb.send(new DeleteCommand({ TableName: TABLE, Key: { userId, taskId } }));

  return new NextResponse(null, { status: 204 });
}
Every write needs the full key (userId + taskId). The ConditionExpression makes DynamoDB check a rule before writing; if it fails, nothing is written and you return a clean 404.
4. app/page.tsx: the frontend (replace the default file)
Because the source code is getting flagged as malicious in CDN firewall. We are unable to share the code in code block. Please get the source code from here.
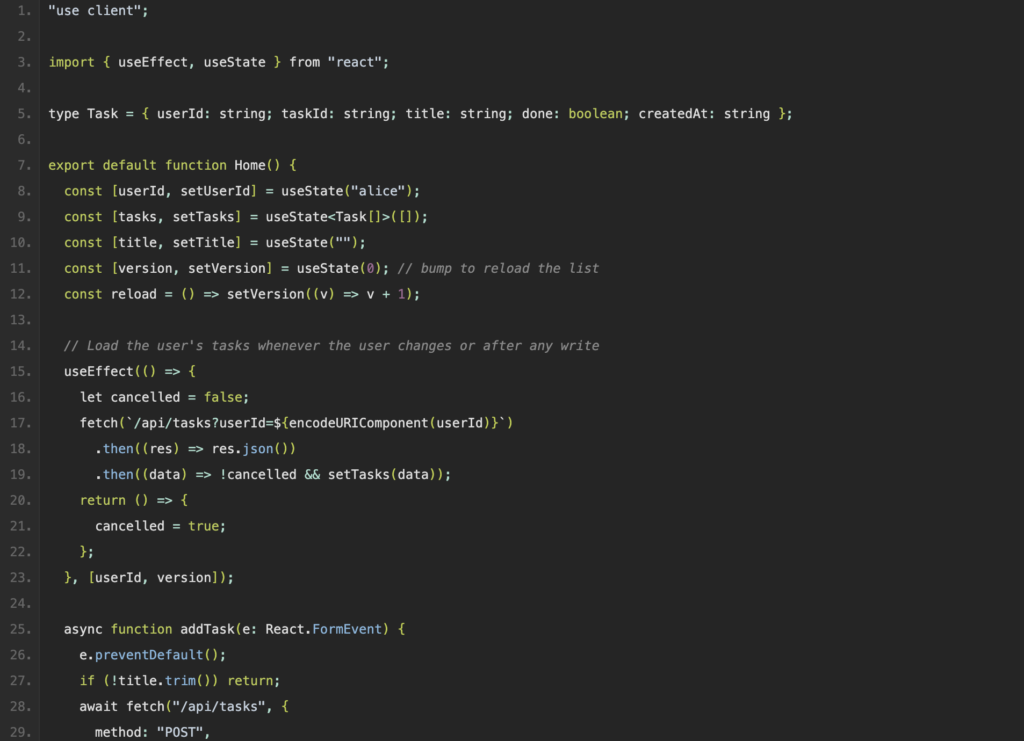
Now with the code set, it’s time to run and test.
Step 5: Run and demo
On the instance, inside tasks-app directory run this two command:
npm run build

npm start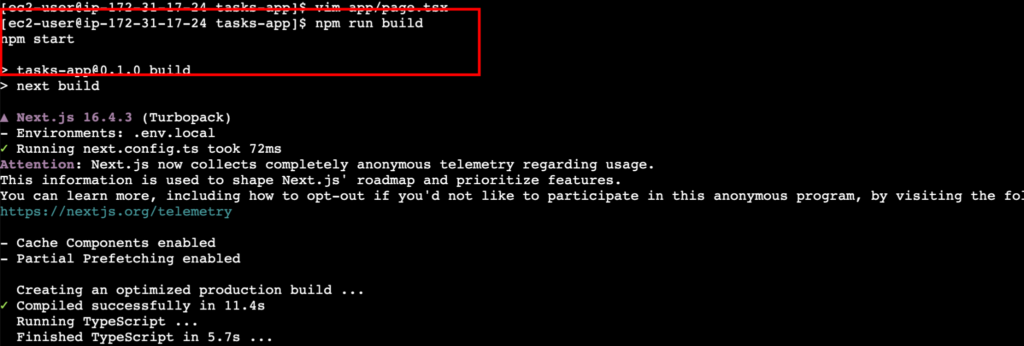
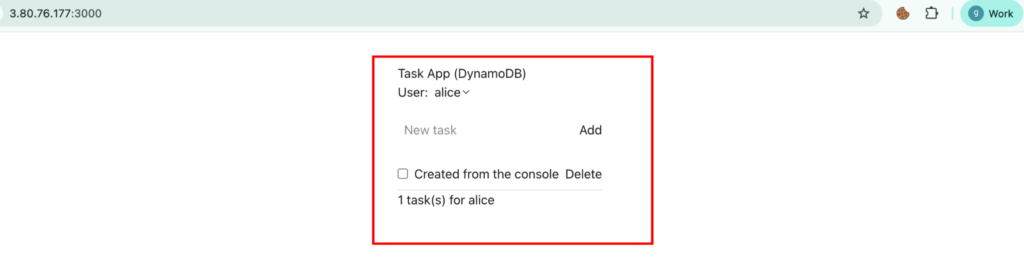
Now open http://<instance-public-IP>:3000 in your browser.
You will be able to see the app.
Now lets add an entry.
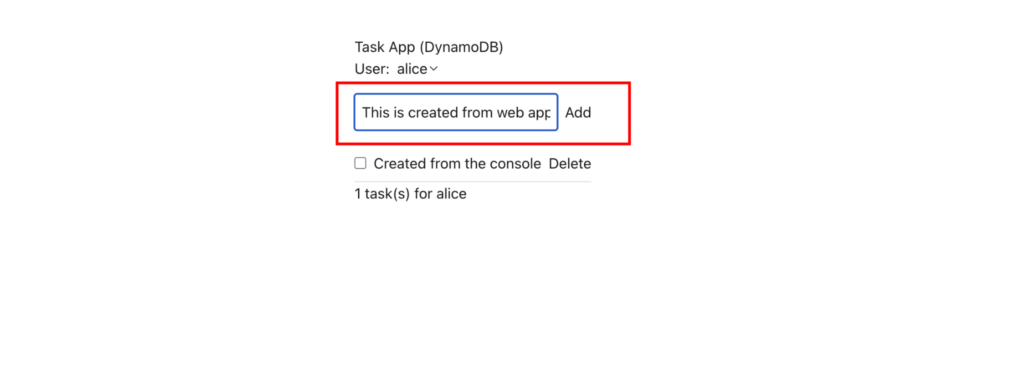
You can see the entry is now created.

And you can also confirm it from the DynamoDB “Explore items”.
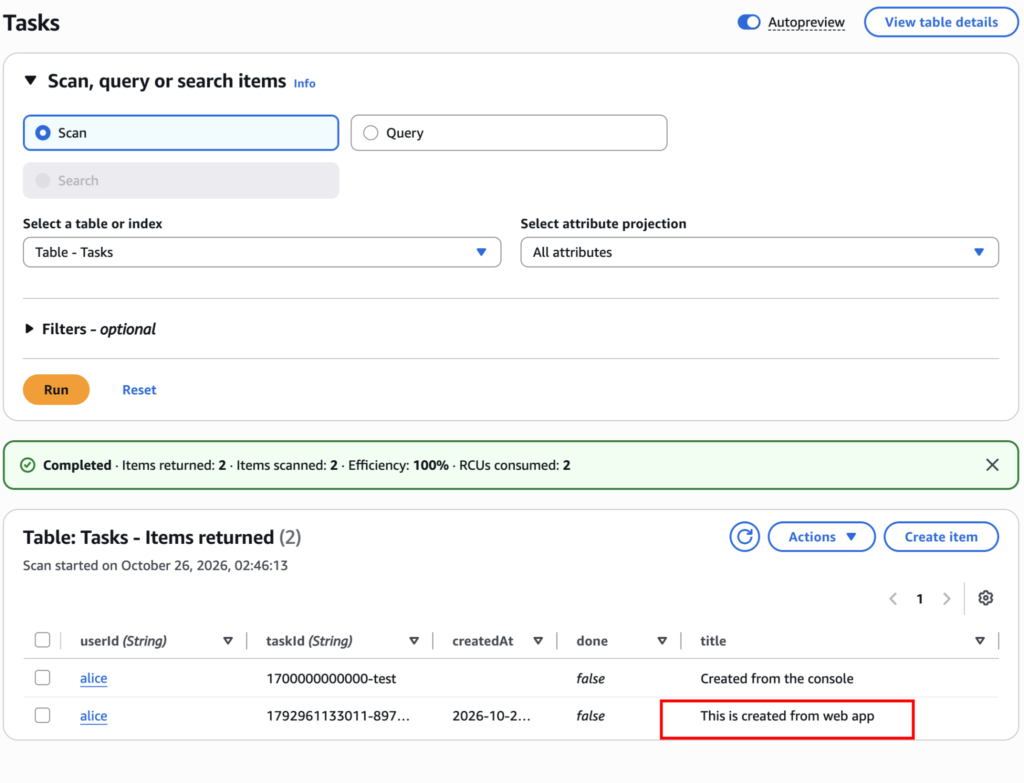
Test the remaining feature on your own.
- Switch the user to bob and add a task. Bob’s list is empty at first: same table, different partition key.
- Tick a task. Refresh the console: done is true and an updatedAt attribute has appeared.
- Delete a task. It disappears from the console too.
- Edit a task’s title in the console and refresh the app. The new title shows: the app and the console read the same table.
Troubleshooting
| Error | Cause | Fix |
| CredentialsProviderError / Could not load credentials | No role on the instance | Actions → Security → Modify IAM role → TasksAppEC2Role |
| AccessDeniedException | Wrong account ID or Region in the policy ARN | Fix TasksAppPolicy |
| ResourceNotFoundException | AWS_REGION or TABLE_NAME does not match the table | Fix .env.local, then rebuild and restart |
| Page does not load | Port 3000 closed | Add the inbound rule to the instance’s security group |
Clean up
At demo volume, on-demand DynamoDB costs close to nothing, but remove everything when you are done:
- EC2 → select tasks-app → Instance state → Terminate instance.
- DynamoDB → Tables → select Tasks → Delete.
- IAM → Roles → delete TasksAppEC2Role; Policies → delete TasksAppPolicy.
More Articles to Follow: