Amazon RDS (Relational Database Service) runs MySQL, PostgreSQL, MariaDB, Oracle, SQL Server and Db2 for you. AWS handles provisioning, patching, backups and failover, and you handle schema, queries and access. In this guide we’ll create a MySQL database from the console, connect a small Flask web app to it, and then use the features that matter.
Architecture
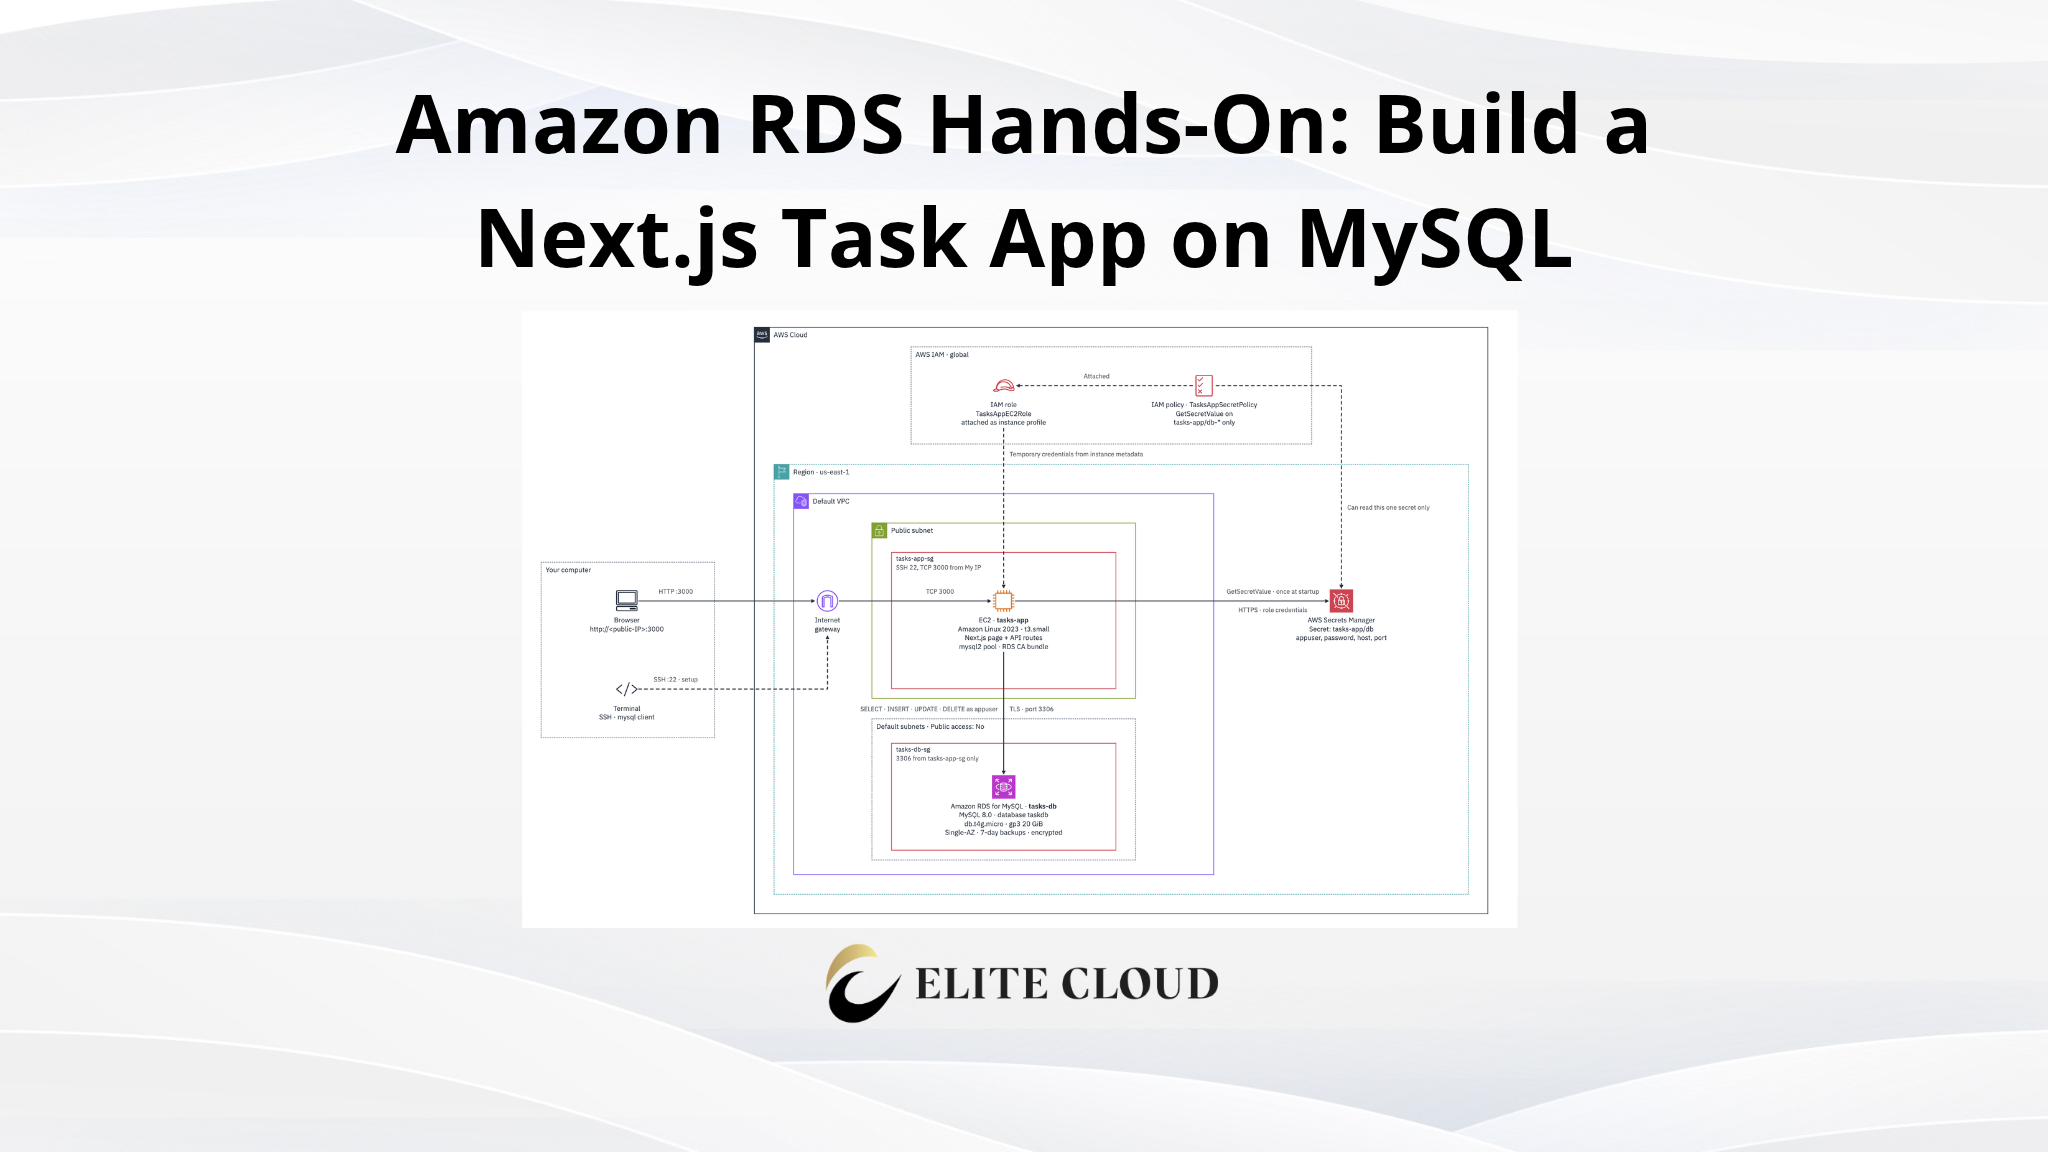
We’ll run an EC2 instance with a Next.js demo Task Tracker app and connect it to an RDS MySQL instance.
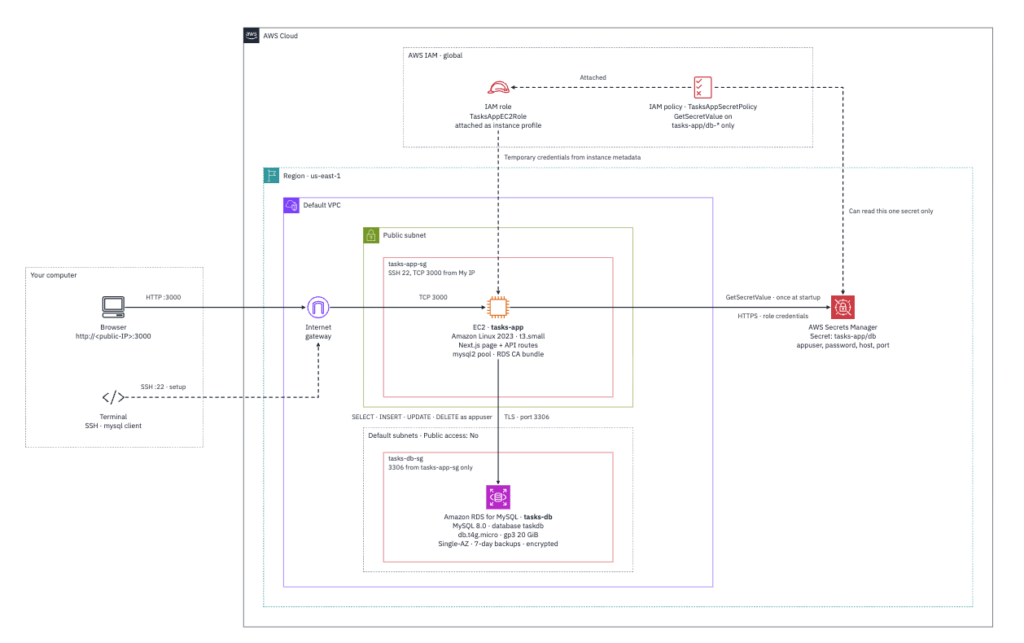
The page calls its own API routes in EC2, and only the routes talk to MySQL. It reads database credentials from Secrets Manager through the instance role, and connects over TLS to the RDS instance with no public access.
Prerequisites
- An AWS account with Console access.
- One Region used throughout. This guide uses us-east-1.
- The default VPC in that Region .
- Basic SSH or EC2 Instance Connect use. The app runs on an EC2 instance; you install Node.js there in Step 5.
Step 1: Create the security groups
Create the firewalls first, so the database trusts the app server by group instead of by IP address.
Open the EC2 console → Security Groups → Create security group. And name it task-app-sg and for VPC choose default VPC. For inbound rules it should be as follow:
- SSH (22) from ec2.instance-connect
- Custom TCP 3000 from My IP
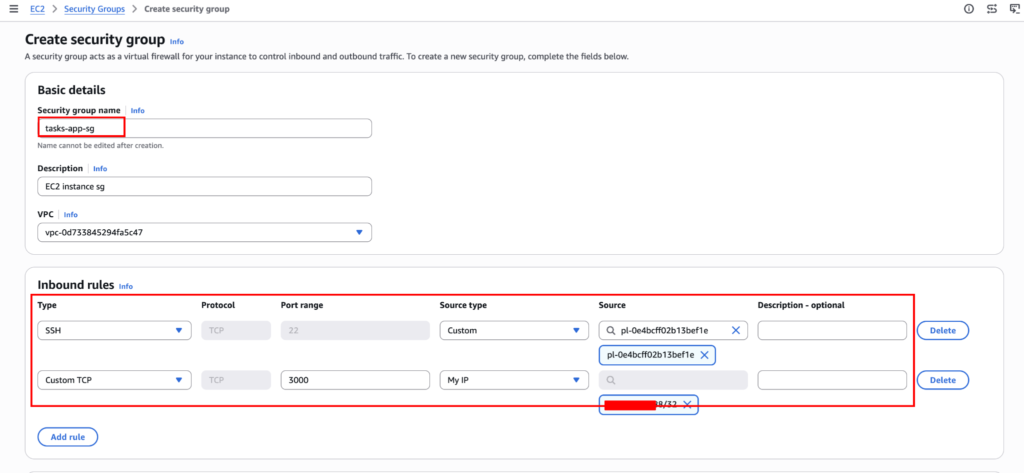
Next, choose Create security group.
Now, create a second group. Name: tasks-db-sg. Inbound rule: MYSQL/Aurora (3306), source Custom → select tasks-app-sg from the list (not an IP range).
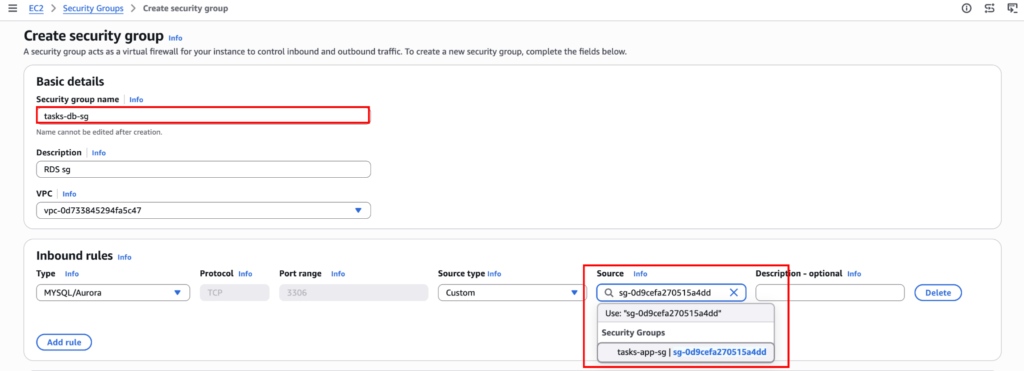
Choose Create security group.
Why reference a group? The rule follows any instance that has tasks-app-sg attached. The app server’s IP can change and it still connects, while nothing else on the internet or in the VPC can reach port 3306.
Step 2: Create the RDS database
Open the RDS console and check the Region (top right) is us-east-1.
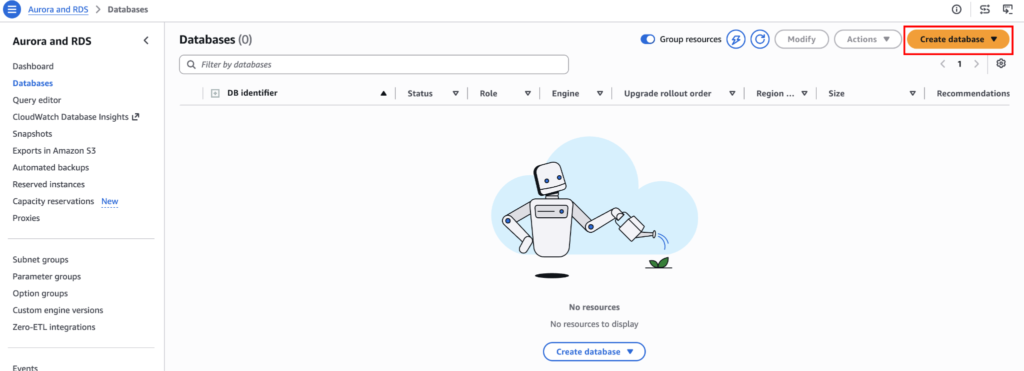
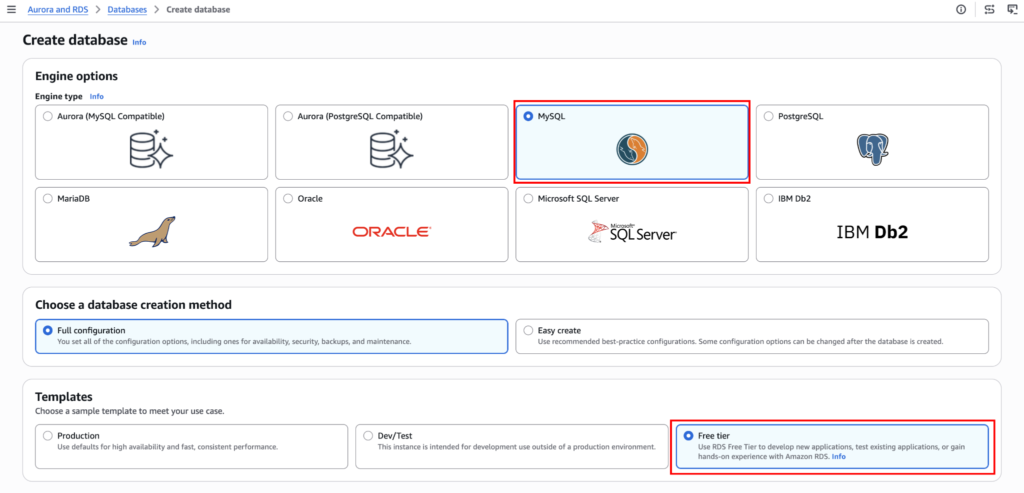
Choose Databases → Create database → Full Configuration.
For, Engine type choose: MySQL. Engine version: the default 8.0.x offered. Templates: Free tier (or Dev/Test if Free tier is not shown).
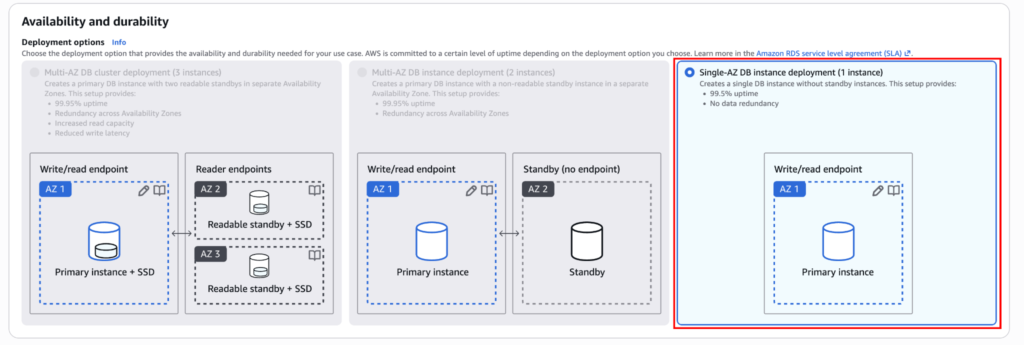
Availability: Single-AZ DB instance. This is sufficient for our demonstration.
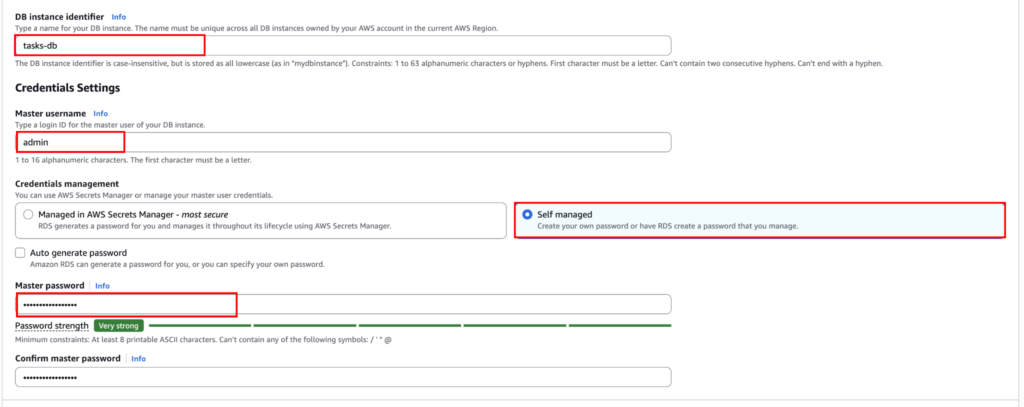
For DB instance identifier use: tasks-db. Master username: admin. Credentials management: Self managed, enter a strong password and keep it for Step 4.
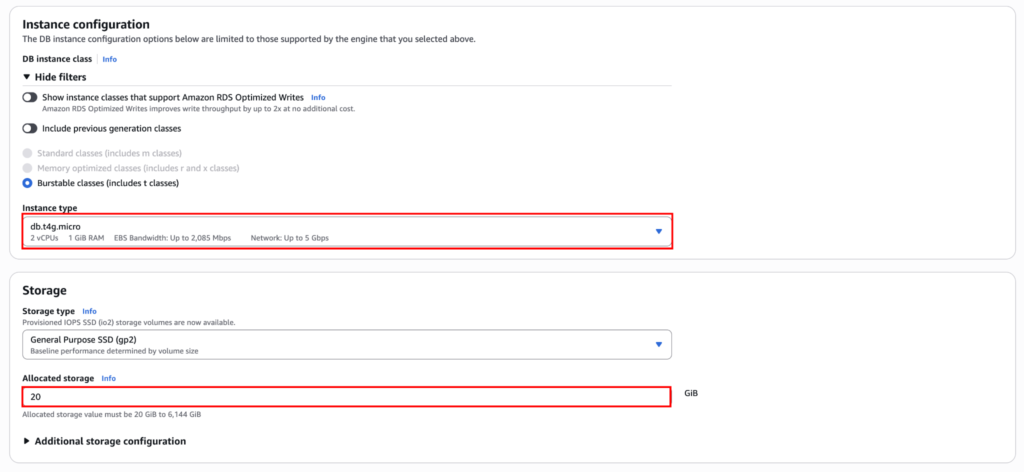
Instance class: db.t4g.micro (or db.t3.micro). Storage: gp3, 20 GiB.
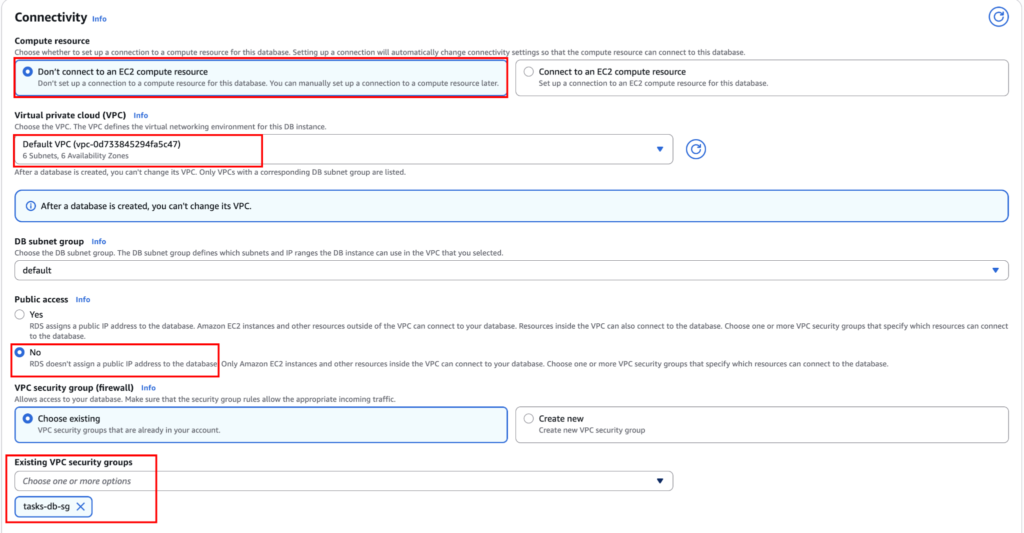
Connectivity:
- Compute resource: Don’t connect to an EC2 compute resource
- VPC: the default VPC
- Public access: No
- VPC security group: Choose existing → tasks-db-sg, and remove default
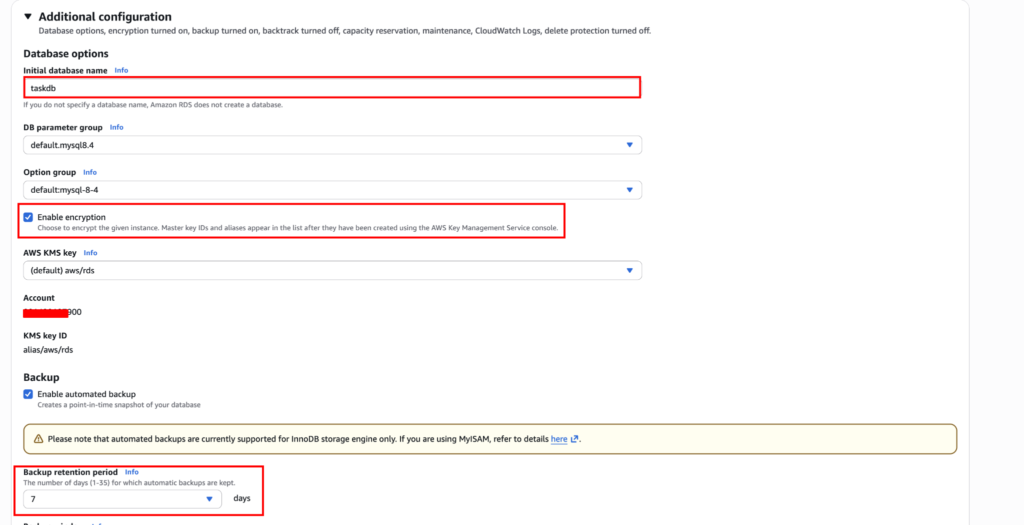
Expand Additional configuration → Initial database name: taskdb. Leave backups on (7 days) and encryption on.
Choose Create database and wait until Status shows Available (about 5 to 10 minutes).

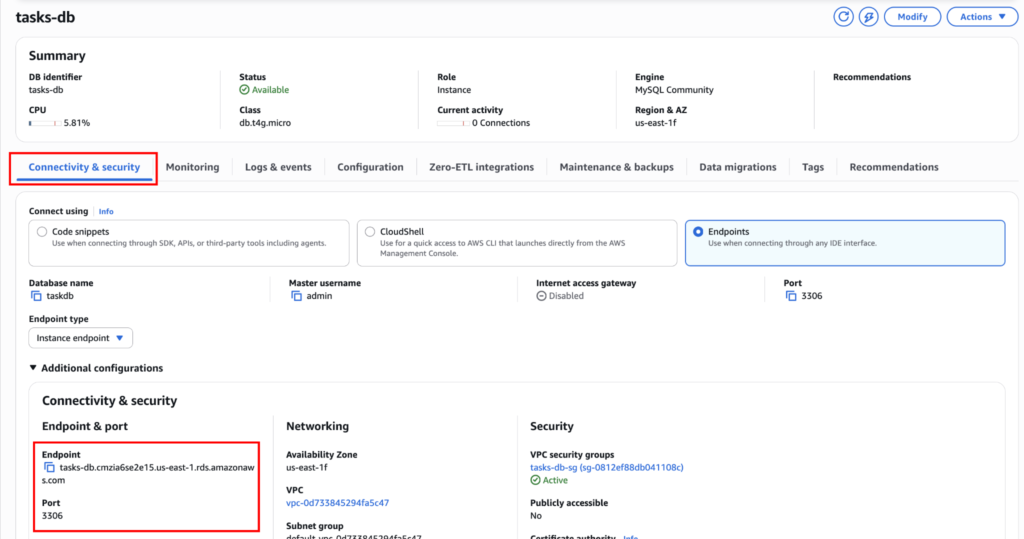
- Open tasks-db → Connectivity & security and copy the Endpoint.
Which creation method? The console offers three. Full configuration shows every setting and is the one this guide uses. Express create builds the database from preset defaults and skips most of the settings above, such as the security group, public access and initial database name. Restore from S3 creates a MySQL instance from an existing backup file in an S3 bucket, which is for migrating a database, not starting a new one.
Why these settings? Public access: No means the database has no internet address at all; only resources inside the VPC that pass tasks-db-sg can reach it. The Initial database name creates taskdb for you, so you do not have to run CREATE DATABASE. Always connect by endpoint, never by IP: the IP changes after a failover or restore, the endpoint does not.
Step 3: Create an IAM role and launch EC2
The app does not keep the database password in a file. It reads it from AWS Secrets Manager at startup, and it is allowed to do that by an IAM role attached to the EC2 instance. There is no password and no AWS key on the server or in the code.
| Password in .env file | Secrets Manager + IAM role (used here) | |
| Where the password lives | In a file on the server | Encrypted in Secrets Manager |
| If the server or repo leaks | Password works from anywhere in the VPC | Nothing to steal |
| Changing the password | Edit files on every server | Update the secret once |
| Audit | None | Every read logged in CloudTrail |
1. Create the policy
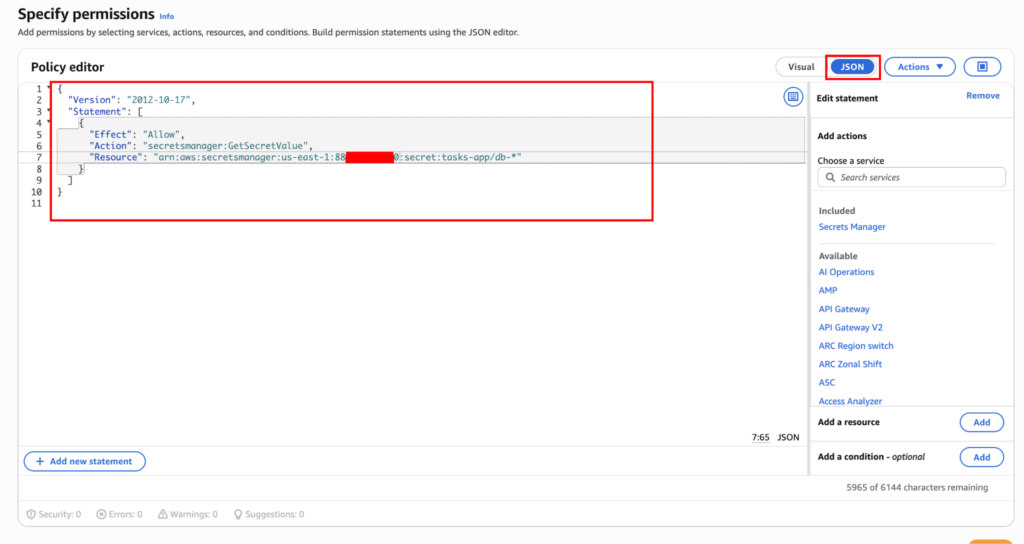
IAM → Policies → Create policy → JSON. Paste this, replacing 123456789012 with your account ID, and name it TasksAppSecretPolicy:
{

  "Version": "2012-10-17",

  "Statement": [

    {

      "Effect": "Allow",

      "Action": "secretsmanager:GetSecretValue",

      "Resource": "arn:aws:secretsmanager:us-east-1:123456789012:secret:tasks-app/db-*"

    }

  ]

}
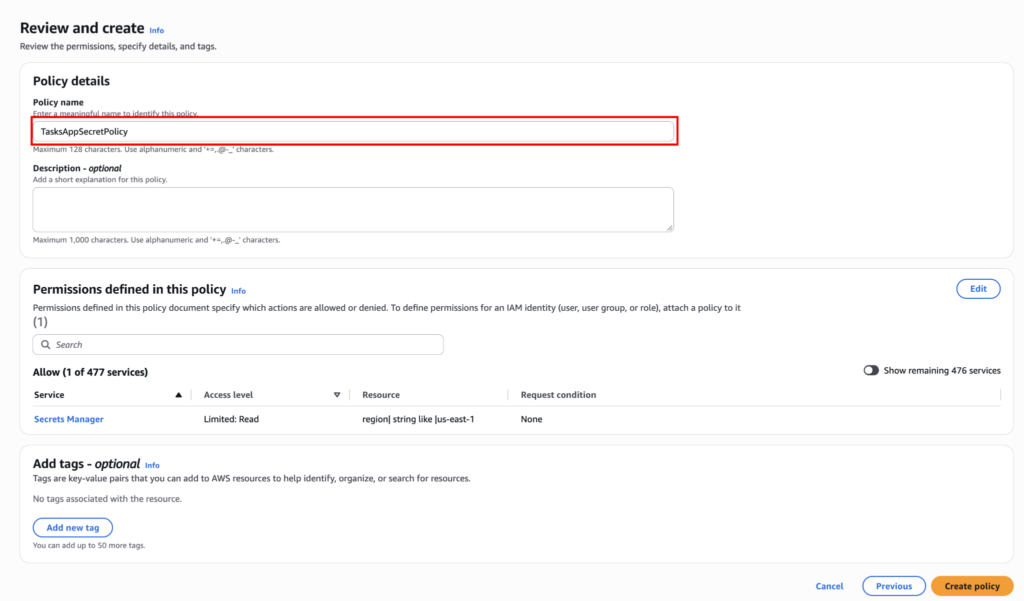
The app can read one secret and nothing else. The -* at the end is needed because Secrets Manager adds a random 6-character suffix to every secret ARN.
2. Create the role
Now create the IAM Role so the instance can access the secrets from the secrets manager. Go IAM → Roles → Create role. And select, Trusted entity: AWS service, use case EC2 → Next.
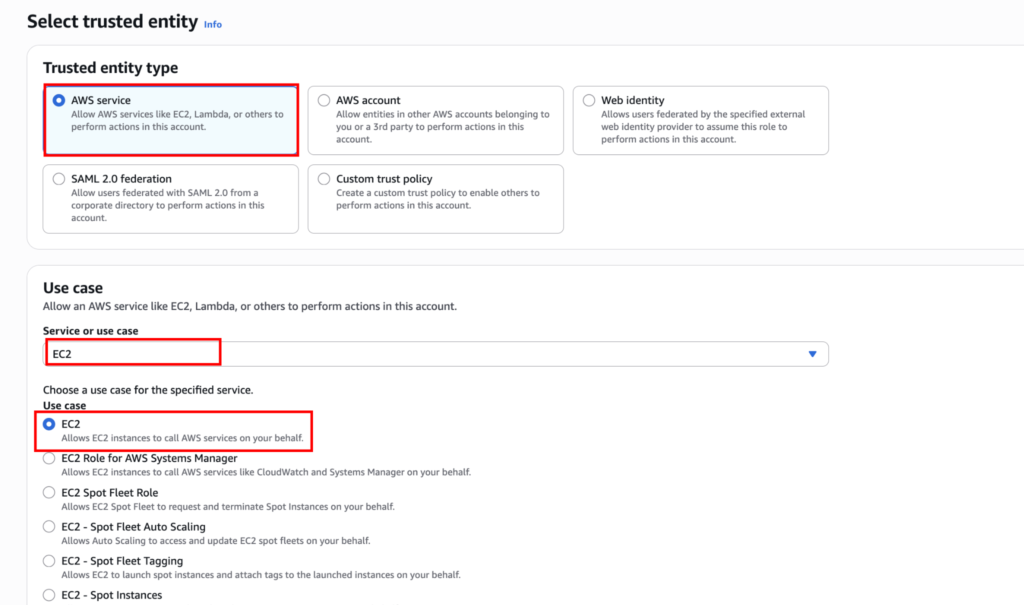
Now, Attach TasksAppSecretPolicy and click Next.
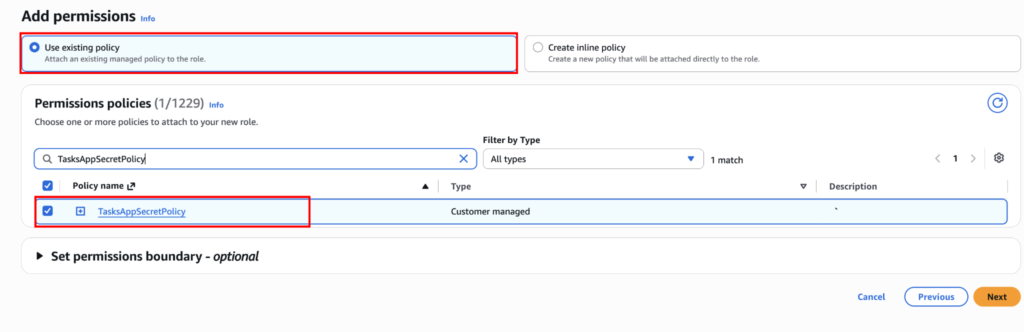
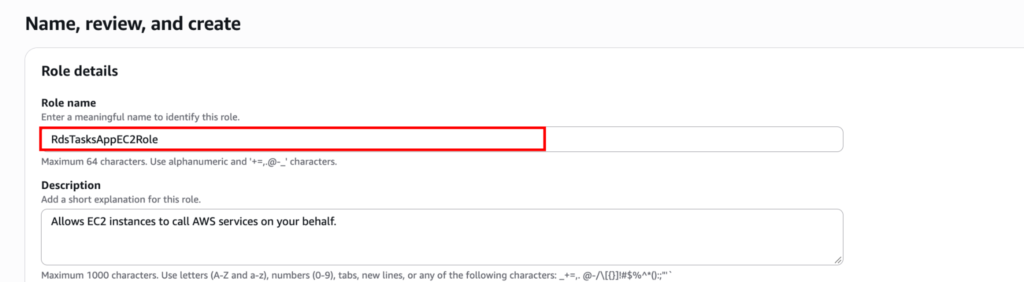
Give the Role name: RdsTasksAppEC2Role and click Create role.
3. Launch the instance with the role
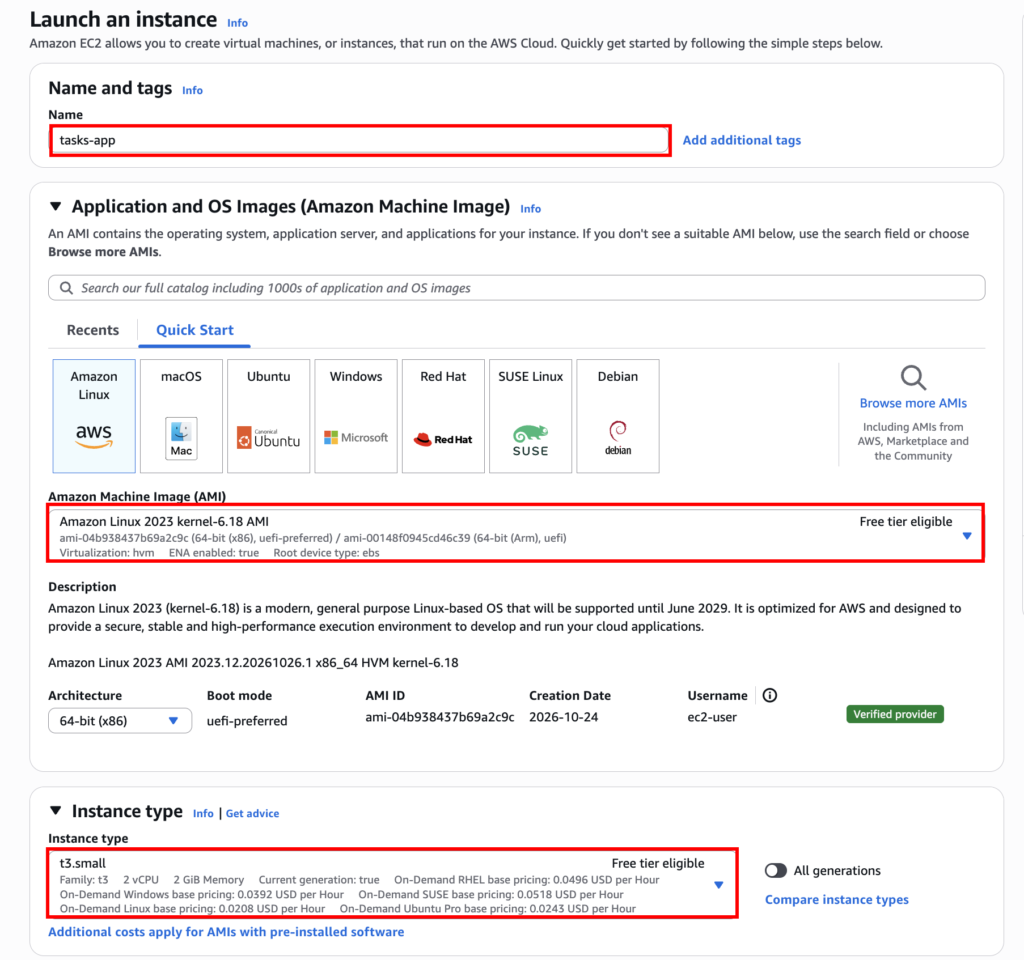
Now lets create an EC2 instance. Go to EC2 → Launch instance. Choose the name tasks-app. And for all the other info,
AMI: Amazon Linux 2023. Instance type: t3.small (a 1 GB micro instance can run out of memory during npm run build).
Key pair: select or create one for SSH.

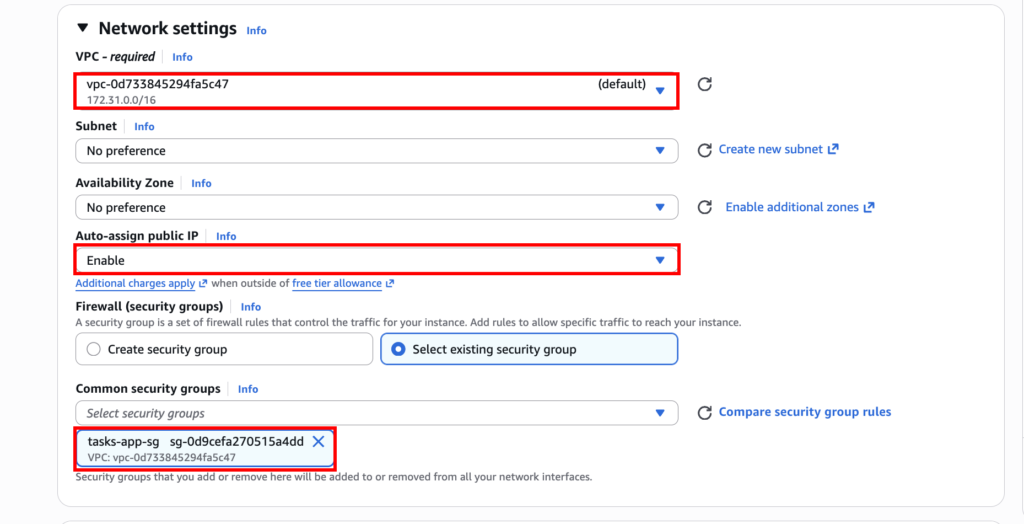
Network settings → Edit → VPC: the default VPC, Auto-assign public IP: Enable → Select existing security group → tasks-app-sg.
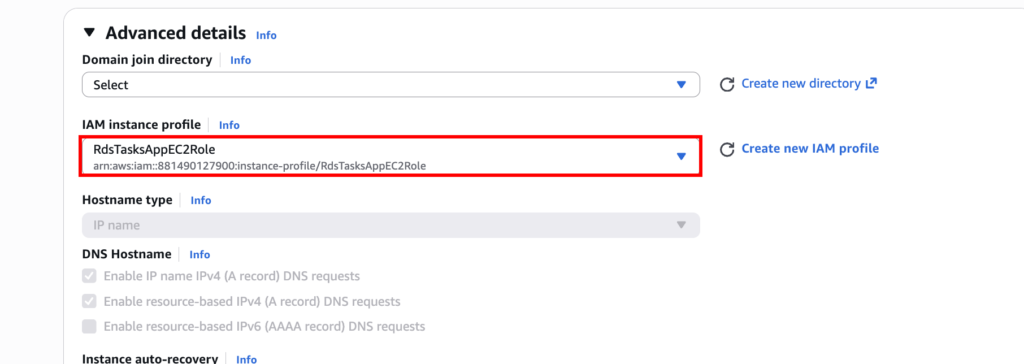
Advanced details → IAM instance profile → RdsTasksAppEC2Role. (This is where we connect the role)
Once done, click on Launch instance.
Step 4: Prepare the database
Connect to the database by hand first. If this works, the network and security groups are right, and any later error is in the app.
Connect to the instance and test the database
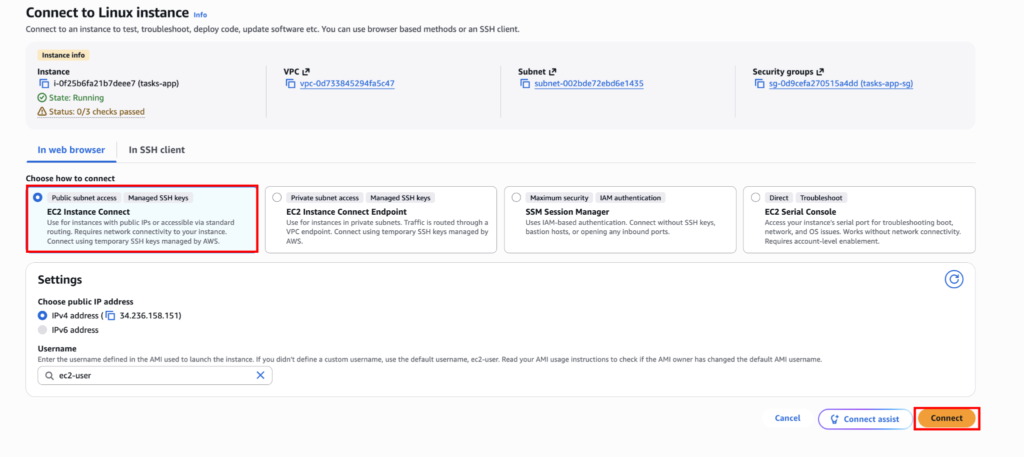
In the EC2 console select tasks-app → Connect → EC2 Instance Connect (or SSH with your key pair), then run:
# MySQL-compatible client

sudo dnf install -y mariadb105

# RDS certificate bundle, so the connection is encrypted and verified

curl -O https://truststore.pki.rds.amazonaws.com/global/global-bundle.pem

# Connect as the master user (paste the endpoint from Step 2)

mysql -h <RDS-ENDPOINT> -u admin -p --ssl-ca=global-bundle.pem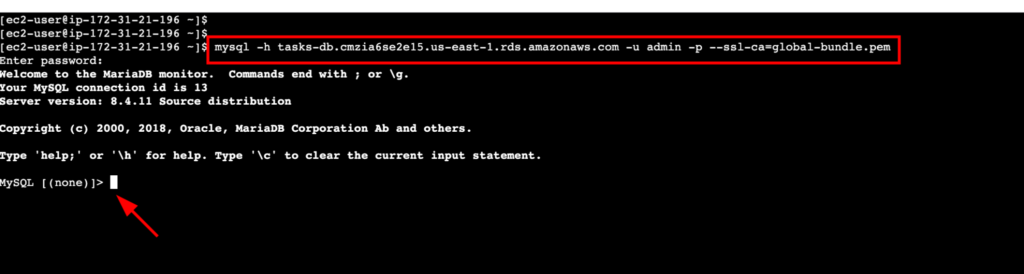
If the command hangs and times out, the security groups are wrong (Step 1). If you see Access denied, the username or password is wrong.
Create the table and the app user
At the mysql> prompt:
USE taskdb;

CREATE TABLE tasks (

  id         INT AUTO_INCREMENT PRIMARY KEY,

  title      VARCHAR(200) NOT NULL,

  done       BOOLEAN NOT NULL DEFAULT FALSE,

  created_at TIMESTAMP NOT NULL DEFAULT CURRENT_TIMESTAMP

);

INSERT INTO tasks (title) VALUES ('Created from the mysql client');

-- The app gets its own user with data rights only, and must use TLS

CREATE USER 'appuser'@'%' IDENTIFIED BY 'Choose-A-Strong-Passw0rd' REQUIRE SSL;

GRANT SELECT, INSERT, UPDATE, DELETE ON taskdb.* TO 'appuser'@'%';

SELECT * FROM tasks;

EXIT;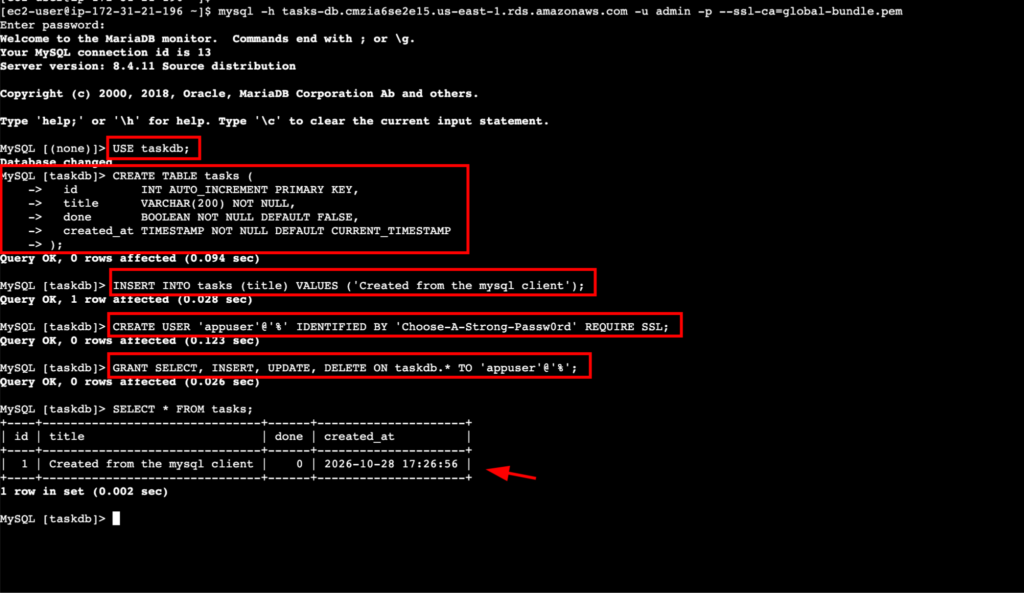
Why a separate user? The app never uses admin. appuser can read and change rows in taskdb but cannot drop tables, create users or touch other databases. A bug or SQL injection in the app is limited to the same four actions.
Store the app credentials in Secrets Manager
- Open Secrets Manager → Store a new secret. Secret type: Credentials for Amazon RDS database. User name: appuser. Password: the one you used in CREATE USER. Database: select tasks-db → Next.
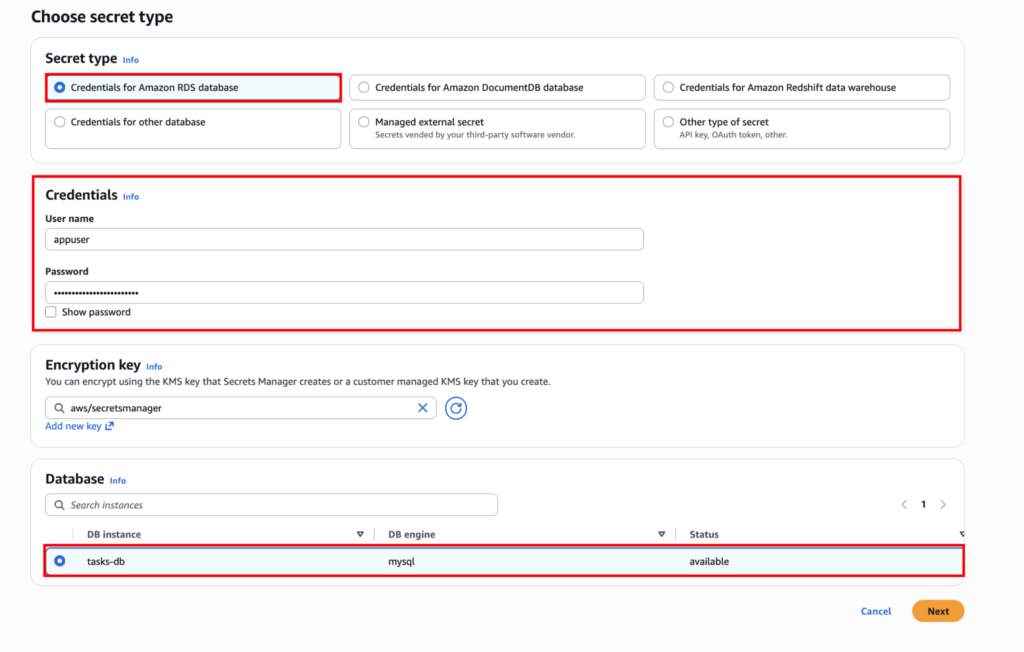
- Secret name: tasks-app/db → Next → leave rotation off for now → Next → Store.
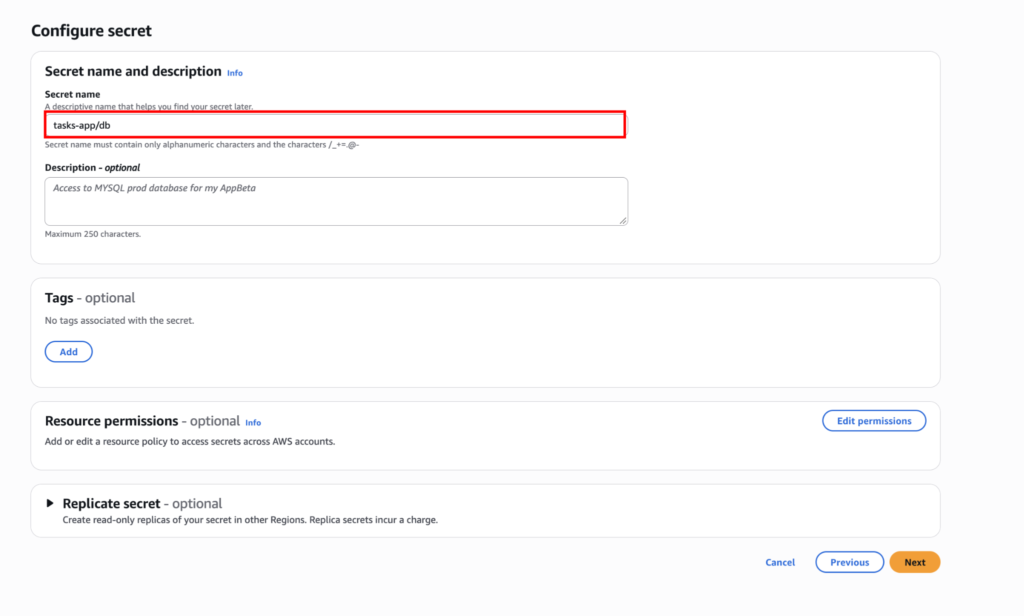
The secret now holds username, password, host and port as JSON. Because you picked the database, host is already the RDS endpoint, so the app needs only the secret’s name.

Step 5: Build the Next.js app
Next.js gives you the frontend (a React page) and the backend (API routes) in one project. The browser never talks to the database; only the API routes on the EC2 instance do.
Install Node.js and create the project
On the instance:
# Install Node.js LTS with nvm

curl -o- https://raw.githubusercontent.com/nvm-sh/nvm/v0.40.3/install.sh | bash

source ~/.bashrc

nvm install --lts

# Check the role is attached: this should print RdsTasksAppEC2Role in the ARN

aws sts get-caller-identity

mkdir tasks-app

sudo dnf install -y libatomic

# Create the app and install the MySQL driver and the Secrets Manager SDK

npx create-next-app@latest tasks-app --yes

cd tasks-app

npm install mysql2 @aws-sdk/client-secrets-manager

# The app needs the RDS certificate bundle from Step 4

cp ~/global-bundle.pem .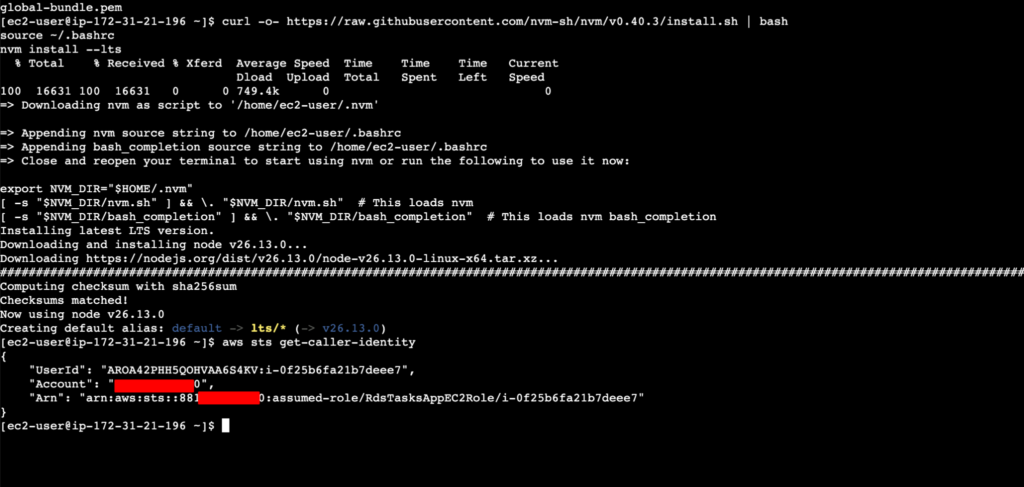
Add the settings in a new file .env.local in the project root. Notice there is no host, user or password in it:
AWS_REGION=us-east-1

DB_SECRET_ID=tasks-app/db

DB_NAME=taskdb
You need to create five files. Make the folders first, from the project root (the folder that contains app/):
mkdir -p lib app/api/health "app/api/tasks/[id]"
If your project has a src/ folder, create them inside src/ instead. The @/lib/db import works in both layouts.
| File | Role | SQL |
| lib/db.ts | Reads the secret, opens a connection pool | — |
| app/api/tasks/route.ts | List and add tasks | SELECT, INSERT |
| app/api/tasks/[id]/route.ts | Complete and delete a task | UPDATE, DELETE |
| app/api/health/route.ts | Shows which database server answered | SELECT @@hostname, VERSION() |
| app/page.tsx | The web page | Calls the API routes |
1. lib/db.ts: the connection
import fs from "fs";

import path from "path";

import mysql from "mysql2/promise";

import { SecretsManagerClient, GetSecretValueCommand } from "@aws-sdk/client-secrets-manager";

type DbSecret = { username: string; password: string; host: string; port?: number };

let poolPromise: Promise<mysql.Pool> | null = null;

async function createPool(): Promise<mysql.Pool> {

  // No keys in code: on EC2 the SDK gets temporary credentials from the instance role.

  const sm = new SecretsManagerClient({ region: process.env.AWS_REGION });

  const res = await sm.send(new GetSecretValueCommand({ SecretId: process.env.DB_SECRET_ID }));

  const secret: DbSecret = JSON.parse(res.SecretString ?? "{}");

  return mysql.createPool({

    host: secret.host, // the RDS endpoint, stored in the secret

    port: Number(secret.port ?? 3306),

    user: secret.username,

    password: secret.password,

    database: process.env.DB_NAME ?? "taskdb",

    connectionLimit: 5,

    // TLS, verified against the RDS certificate bundle

    ssl: { ca: fs.readFileSync(path.join(process.cwd(), "global-bundle.pem")) },

  });

}

// One pool for the whole app, created on the first request and reused after that.

export function getPool(): Promise<mysql.Pool> {

  if (!poolPromise) {

    poolPromise = createPool().catch((err) => {

      poolPromise = null; // try again on the next request

      throw err;

    });

  }

  return poolPromise;

}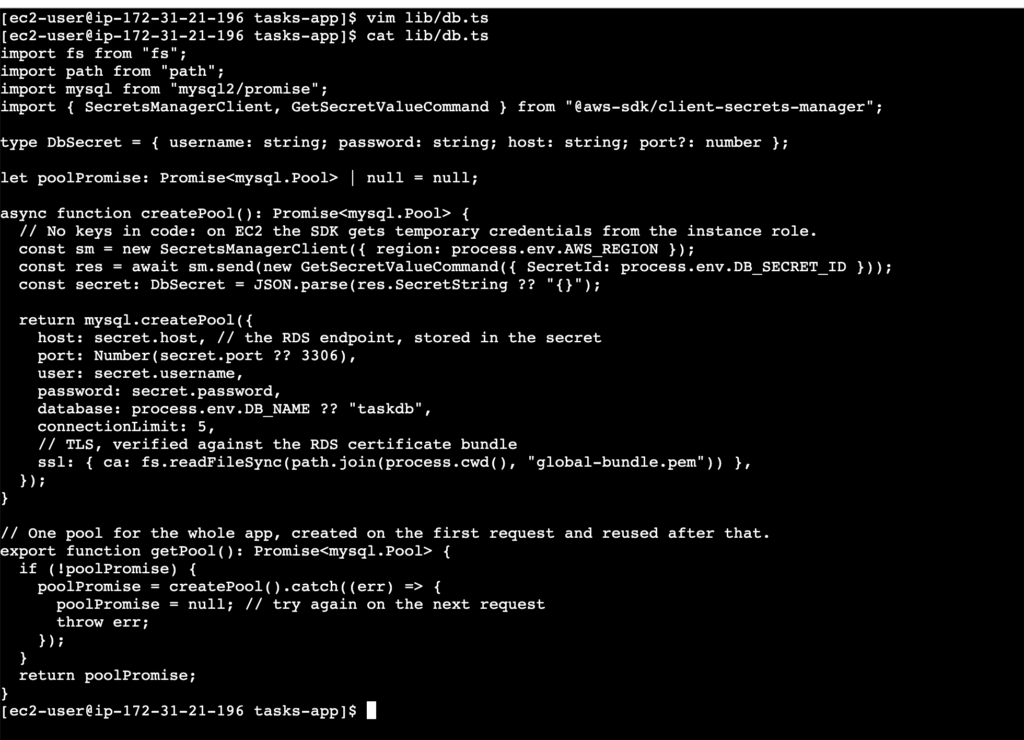
The secret is read once, when the first request arrives. After that the app reuses a pool of up to 5 open connections, so each request skips the TCP and TLS handshake. Opening a new connection per request is the most common cause of RDS running out of connections.
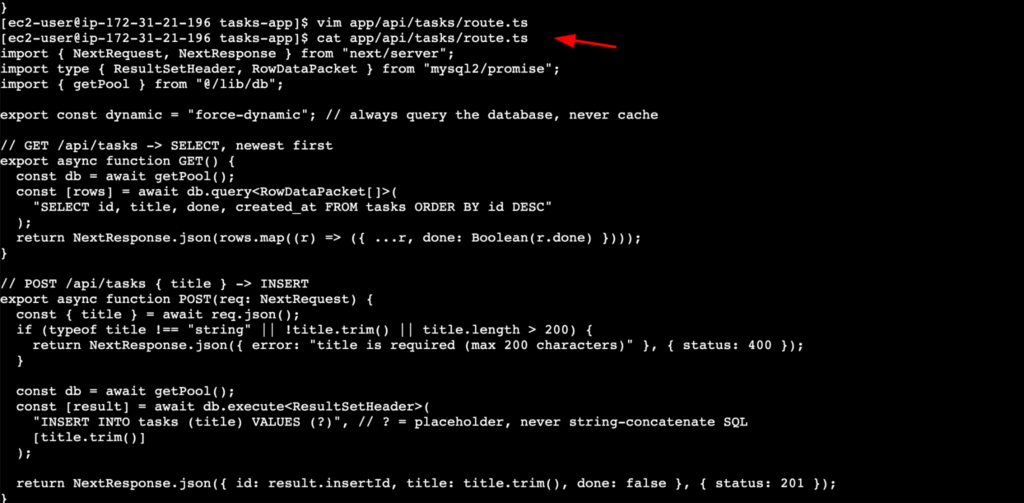
2. app/api/tasks/route.ts: list and add
import { NextRequest, NextResponse } from "next/server";

import type { ResultSetHeader, RowDataPacket } from "mysql2/promise";

import { getPool } from "@/lib/db";

// export const dynamic = "force-dynamic"; // always query the database, never cache

// GET /api/tasks -> SELECT, newest first

export async function GET() {

  const db = await getPool();

  const [rows] = await db.query<RowDataPacket[]>(

    "SELECT id, title, done, created_at FROM tasks ORDER BY id DESC"

  );

  return NextResponse.json(rows.map((r) => ({ ...r, done: Boolean(r.done) })));

}

// POST /api/tasks { title } -> INSERT

export async function POST(req: NextRequest) {

  const { title } = await req.json();

  if (typeof title !== "string" || !title.trim() || title.length > 200) {

    return NextResponse.json({ error: "title is required (max 200 characters)" }, { status: 400 });

  }

  const db = await getPool();

  const [result] = await db.execute<ResultSetHeader>(

    "INSERT INTO tasks (title) VALUES (?)", // ? = placeholder, never string-concatenate SQL

    [title.trim()]

  );

  return NextResponse.json({ id: result.insertId, title: title.trim(), done: false }, { status: 201 });

}
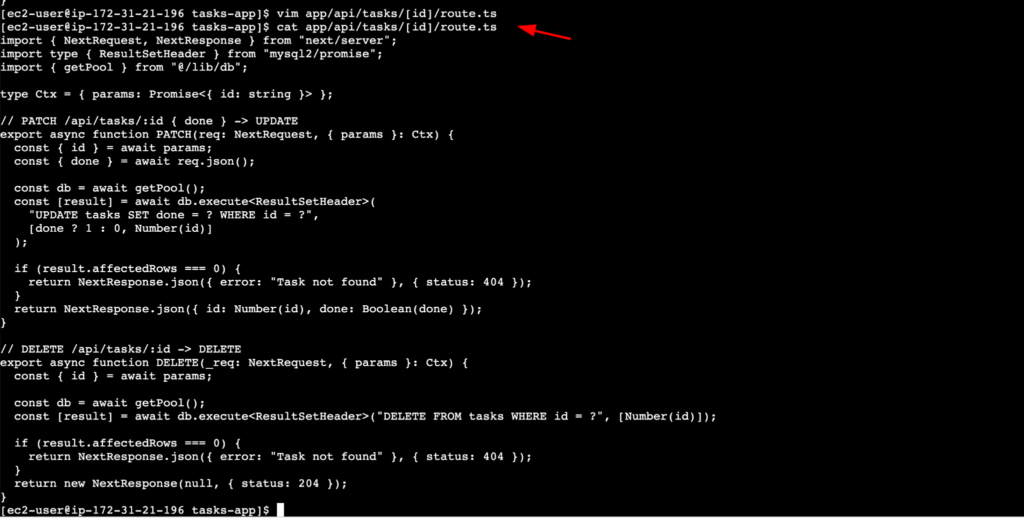
3. app/api/tasks/[id]/route.ts: complete and delete
import { NextRequest, NextResponse } from "next/server";

import type { ResultSetHeader } from "mysql2/promise";

import { getPool } from "@/lib/db";

type Ctx = { params: Promise<{ id: string }> };

// PATCH /api/tasks/:id { done } -> UPDATE

export async function PATCH(req: NextRequest, { params }: Ctx) {

  const { id } = await params;

  const { done } = await req.json();

  const db = await getPool();

  const [result] = await db.execute<ResultSetHeader>(

    "UPDATE tasks SET done = ? WHERE id = ?",

    [done ? 1 : 0, Number(id)]

  );

  if (result.affectedRows === 0) {

    return NextResponse.json({ error: "Task not found" }, { status: 404 });

  }

  return NextResponse.json({ id: Number(id), done: Boolean(done) });

}

// DELETE /api/tasks/:id -> DELETE

export async function DELETE(_req: NextRequest, { params }: Ctx) {

  const { id } = await params;

  const db = await getPool();

  const [result] = await db.execute<ResultSetHeader>("DELETE FROM tasks WHERE id = ?", [Number(id)]);

  if (result.affectedRows === 0) {

    return NextResponse.json({ error: "Task not found" }, { status: 404 });

  }

  return new NextResponse(null, { status: 204 });

}
Every query uses ? placeholders. The driver sends the values separately from the SQL, so a title like ‘); DROP TABLE tasks; — is stored as plain text and never runs.
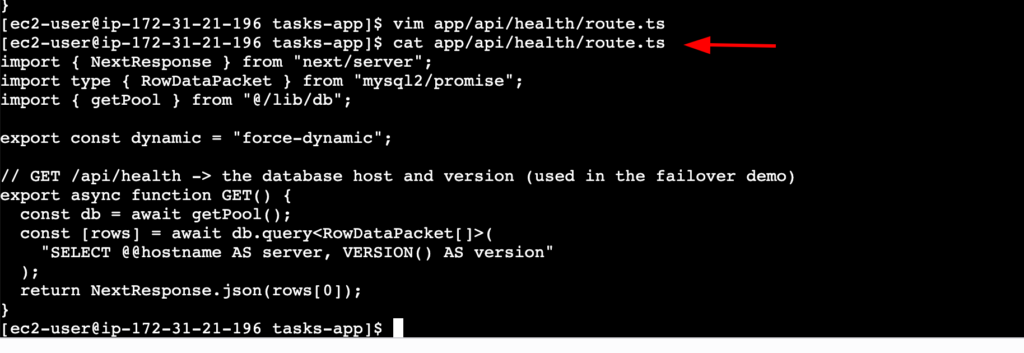
4. app/api/health/route.ts: which server answered
import { NextResponse } from "next/server";

import type { RowDataPacket } from "mysql2/promise";

import { getPool } from "@/lib/db";

// export const dynamic = "force-dynamic";

// GET /api/health -> the database host and version (used in the failover demo)

export async function GET() {

  const db = await getPool();

  const [rows] = await db.query<RowDataPacket[]>(

    "SELECT @@hostname AS server, VERSION() AS version"

  );

  return NextResponse.json(rows[0]);

}
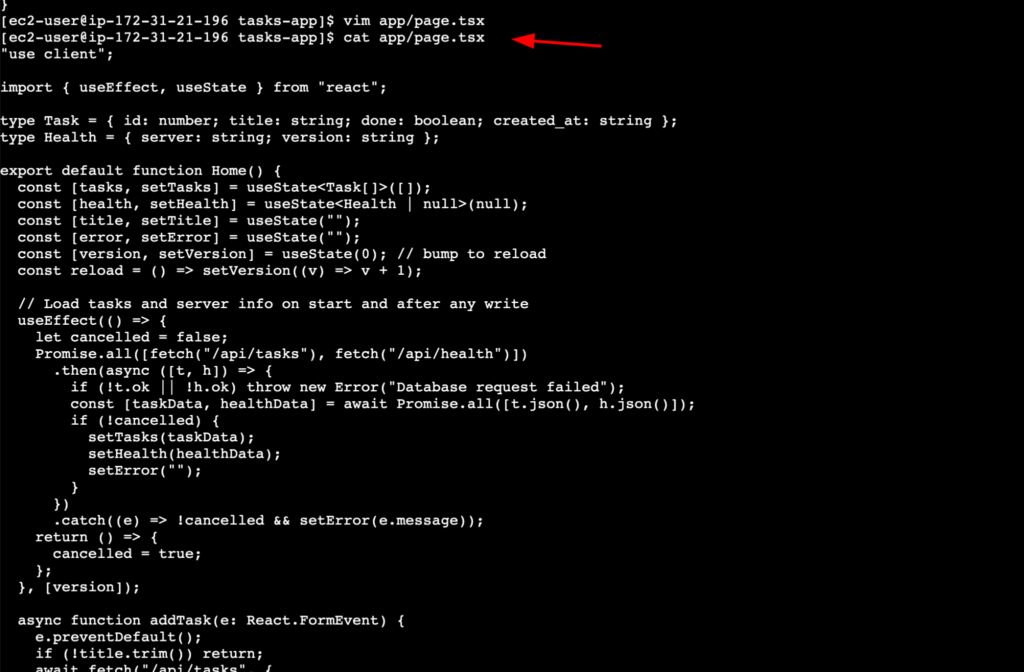
5. app/page.tsx: the frontend (replace the default file)
Due to firewall flagging this code as malicious, we are unable to show this in block. Please download it from here. The firewall gets triggered because of DELETE and other operations.
Step 6: Run and demo
On the instance, inside tasks-app run the following commands.
npm run build

npm start            # serves on port 3000

# Optional: keep it running after you close the terminal

npm install -g pm2

pm2 start npm --name tasks-app -- start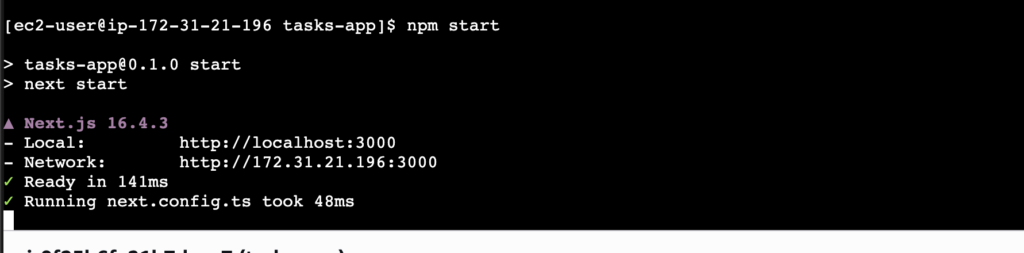
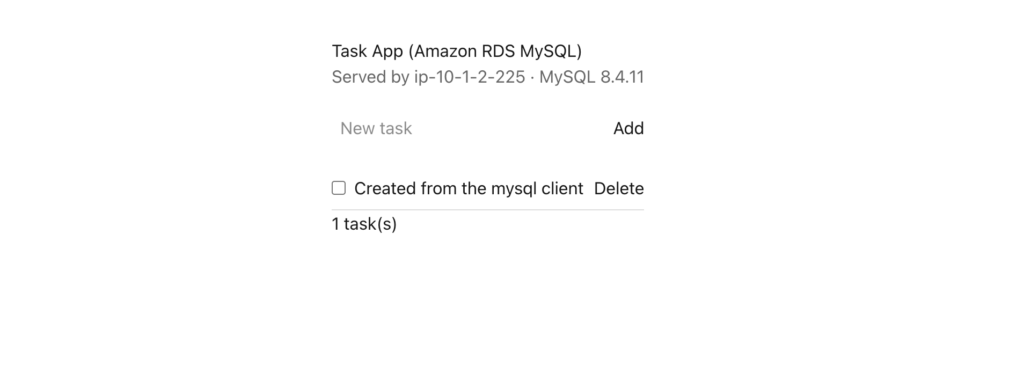
Open http://<instance-public-IP>:3000 in your browser (the public IP is on the instance’s Details tab). Keep a second terminal open on the instance with the mysql client from Step 4, so you can show each change landing in the database.
Clean Up
Once you are done testing with the RDS DB make sure to remove all the services you created, including Secrets Manager, RDS snapshots, IAM Roles.
More Articles to Follow: