Web applications have become the cornerstone of today’s internet landscape. Virtually every type of business now operates a website, making them prevalent in the digital world. However, with this widespread growth of websites, there arises a significant concern regarding their security. In this scenario, AWS WAF stands out as a key solution, effectively addressing these security challenges by providing strong, customized protection that aligns with the growing dependency on web-based platforms for conducting business operations and services.
What is AWS WAF?

AWS WAF (Web Application Firewall) is a security service provided by AWS designed to protect web applications from common web exploits and attacks. It offers powerful tools to monitor and control the traffic that reaches your web applications.
Key Features and Benefits of AWS WAF
Some of the key features of AWS WAF are as follows:
1. Customizable Security Rules: AWS WAF allows you to create custom rules to identify and block malicious web traffic. These rules can target specific attack patterns such as SQL injection, cross-site scripting (XSS), and more.
2. Real-Time Monitoring: It provides real-time visibility into web traffic, allowing you to monitor and respond to potential threats as they occur. This feature is handy for identifying and mitigating sophisticated attacks.
3. Automated Responses: AWS WAF supports automated actions in response to specified conditions, which can help in the immediate mitigation of potential threats. This automation can be critical in preventing or minimizing the impact of an attack.
4. Integration with AWS Services: AWS WAF is designed to seamlessly integrate with other AWS services, such as Amazon CloudFront and the Application Load Balancer. This integration enables users to deploy AWS WAF on multiple AWS resources, providing a consistent security posture across their cloud infrastructure.
Pricing of AWS WAF
In AWS WAF, pricing is provided for “AWS WAF,” “Bot Control,” and “Fraud Control,” each with different rates. For “AWS WAF,” different resource types have specific prices. The Web ACL is priced at $5 per month, prorated hourly, and the “Rule” is $1 per month. “Requests” are charged at $0.60 per million requests, subject to a limit of 1500 WCUs and the default body size. For complete and detailed pricing, check out the AWS WAF pricing page.
Setting Up AWS WAF
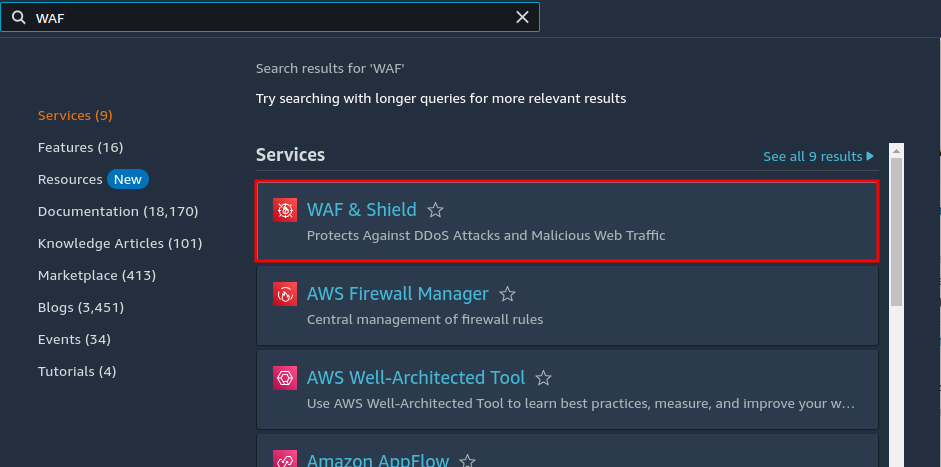
Search for “WAF & Shield” in the search bar and select it.
This will take you to the home page of AWS WAF. Here you will find all the necessary info and pricing about AWS WAF. Click on the “Create web ACL” button.

Step 1
In the “Web ACL” section you can select two resource types, “Amazon CloudFront distributions” and “Regional resources (Application Load Balancers, Amazon API Gateway REST APIs, and AWS AppSync GRaphQL APIs)”.
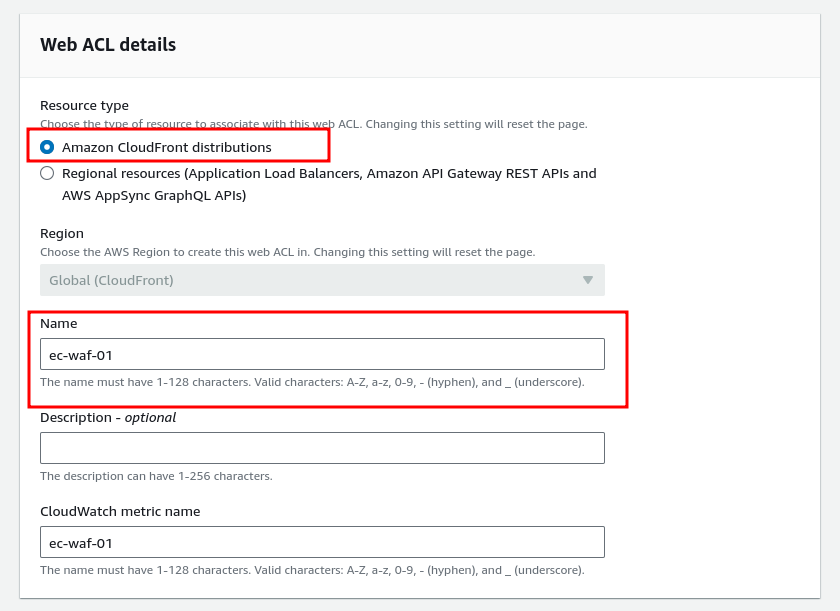
As we already covered the CloudFront setup we will use that for this demonstration. Don’t worry because we will soon bring articles on AWS VPC, APL, and APIs and demonstrate the WAF with the Regional resources.
Now select a name while maintaining the naming rules, you can also add an optional description to describe the WAF activity or uses. The “CloudWatch metric name” will be auto-specified as your WAF name.
The CloudWatch is an AWS service that’s used to monitor and observe services in AWS. CloudWatch Metrics specifically allows you to collect and track various metrics, which are variables representing the performance of your AWS resources.
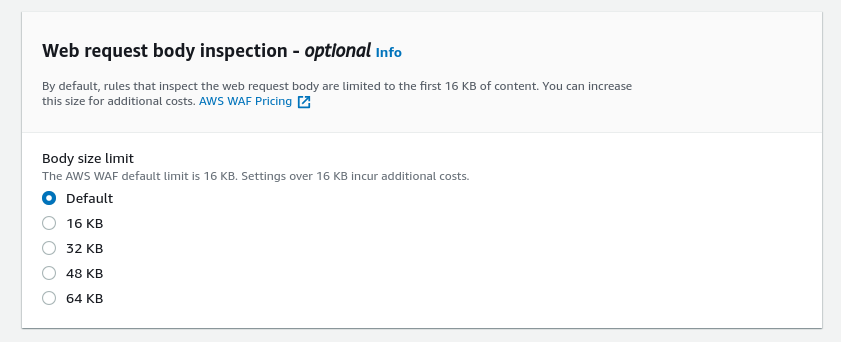
Next in the “Web request body inspection” section keep the body size limit default. Increasing the body size limit allows AWS WAF to do a deeper examination of the content within web requests sent to your applications. The default is 16kb if you increase it your pricing will change. Look at the AWS WAF pricing page for detailed info.
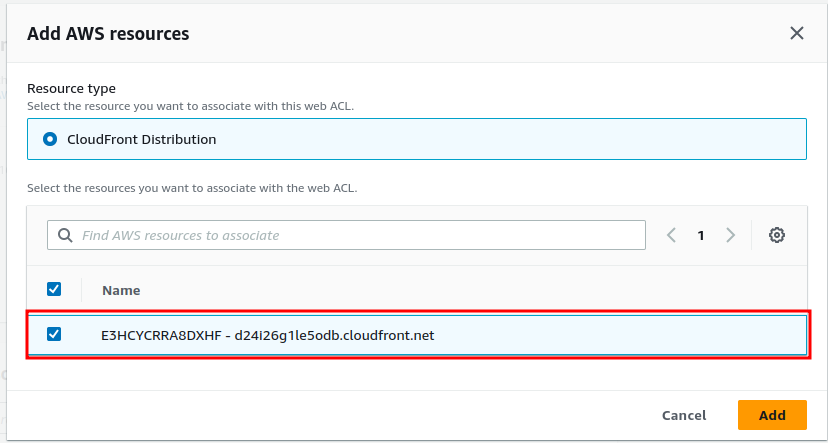
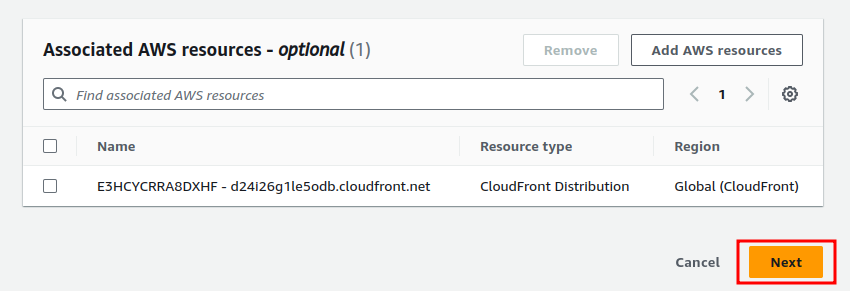
In the “Associated AWS resources” section click on “Add AWS resources”. This will let you add the resources that AWS WAF will protect from attacks. You can choose this option after creating the ACL. But as we already have the CloudFront distribution created we will just select it from here.

From there select the CloudFront distribution you want to add to the WAF and click add.
Now click “next”.
Step 2
Next in Step 2, You need to add the actual WAF rules. You can create custom rules or select from managed rules created by AWS and other security vendors.

Select “Add managed rule groups” to choose from the managed rules.
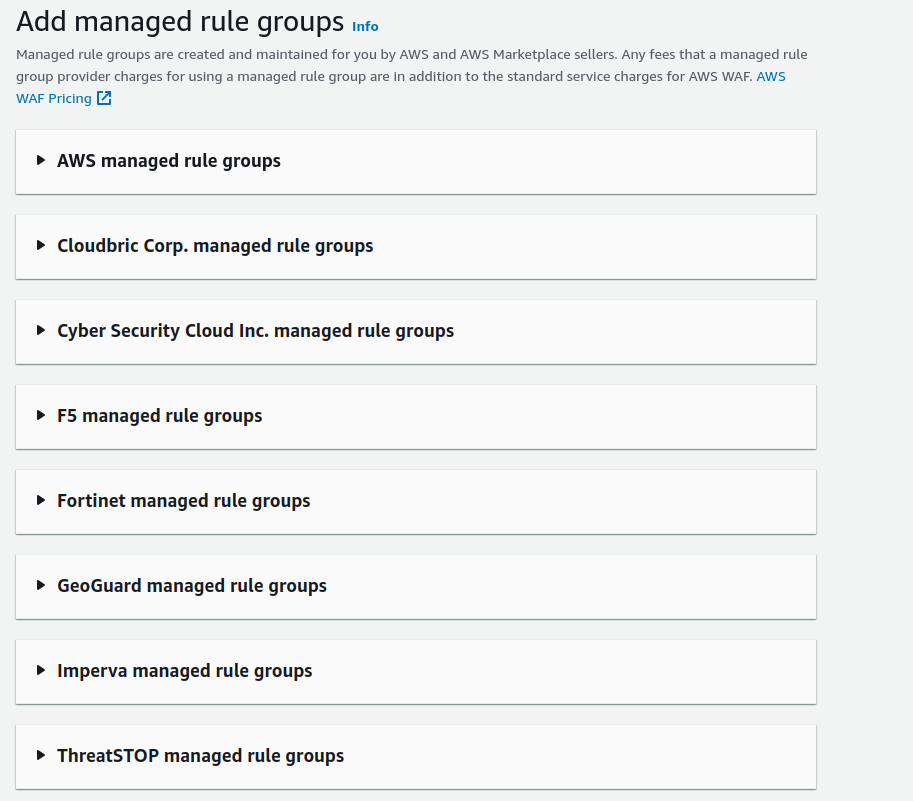
From there you will see the rules are organized by the vendors who created those rules. Now select “AWS managed rule groups”, You will find both free and paid rule groups there.
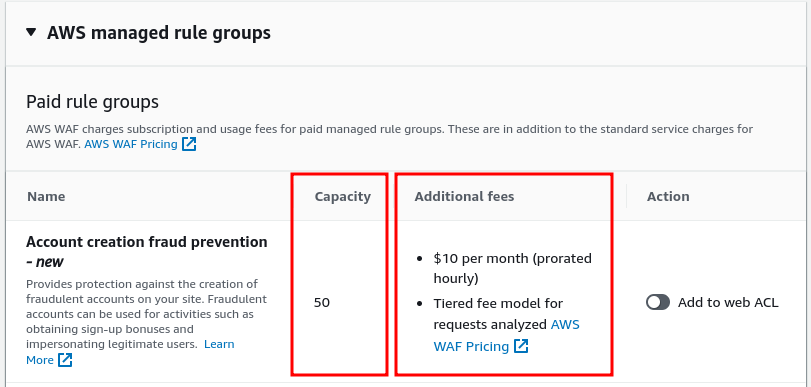
The rule name defines the task it’s going to do, and the capacity is a unit measurement number used in AWS WAF. Additional fees define the cost of that rule.
The “Capacity” in the AWS WAF rule group is a unit of measurement used by AWS WAF to manage and allocate resources needed for processing and implementing the rules within a WEB ACL or Rule Group.
Rule groups that are managed by third-party vendors other than AWS-managed rule groups, require you to subscribe to AWS Marketplace. Now scroll down in the AWS Rule group and you will see the free rule groups.
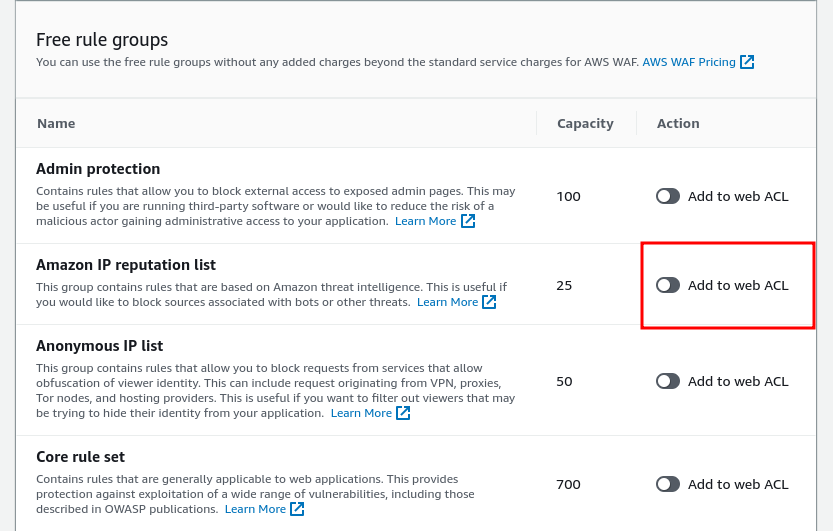
To add a rule click on the “Add to web ACL” and once you are done selecting click “Add rules”.
Let’s select the “Amazon IP reputation list” rule group. This rule group has a huge IP list to the reputation gathered by AWS Cyber Threat Intelligence. This is used to block the known bad IPs that are often used by malicious attackers and bots. The rule group takes 25 units capacity as specified, and the total WCUs for a web ACL can’t exceed 5000. And using over 1500 WCUs affects the pricing.

Take a look at the AWS WAF pricing page to learn more.
The “Default web ACL action for requests that don’t match any rules”, lets you define the action (Allow/Block) for the unmatched request. E.g. What to do when the IP of the request doesn’t match with the IP list provided by the AWS. If you choose “Allow” it will allow that IP, and if you choose “Block” it will block that IP. And this example is specific to the rule group we selected.

Keep the “Default action” to “Allow”. Once it’s done click “Next” and go to “Step 3”.
Step 3
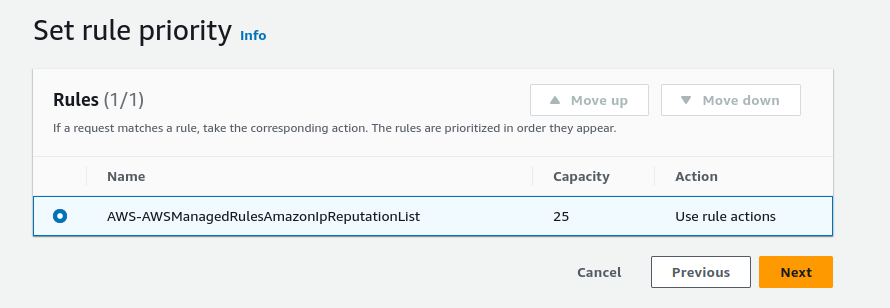
Here you can select the priority of a rule, this lets you define which rules will be applied first.
In AWS WAF, “Rule Priority” determines the sequence in which rules in a Web ACL (Web Access Control List) are applied to web requests. For instance, consider you have two rules: one to block requests from a known bad IP address and another to detect SQL injection attacks. If you prioritize the SQL injection rule over the bad IP block rule, the system will expend significant resources checking every request for SQL injection, even those from bad IPs, leading to inefficiency.
Contrariwise, by giving higher priority to the bad IP block rule, AWS WAF will first eliminate all traffic from these unwanted sources. Subsequently, it will apply the SQL injection rule to the remaining traffic. This approach is more resource-efficient and effective, as it reduces the volume of traffic subject to the more resource-intensive SQL injection check.
Since we have only one rule just select the rule and click “Next”.
Step 4
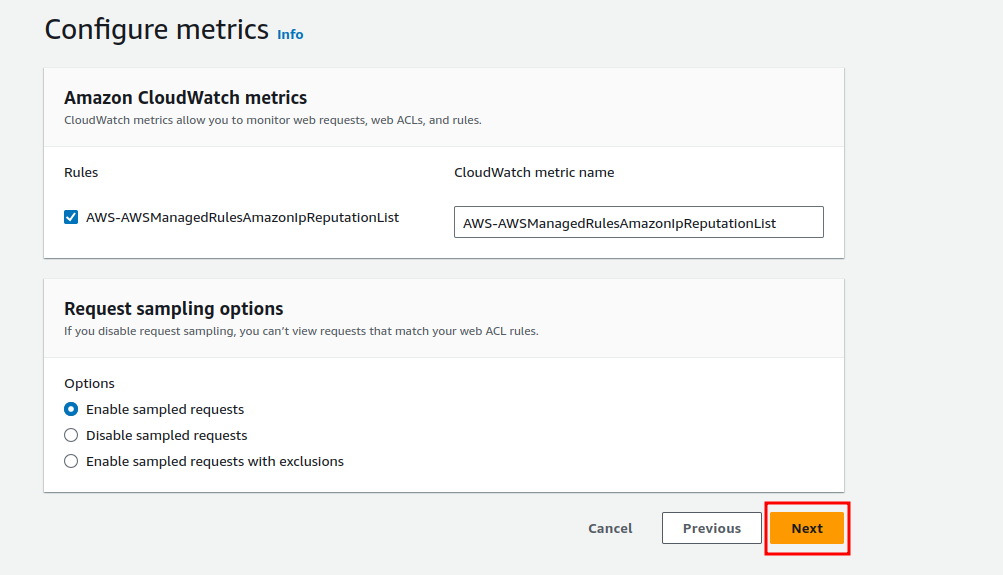
In this step, you need to configure the CloudWatch. Just keep everything as it is and click “Next”.
Step 5
Here in “Step 5” you will get to review all the configuration you did up until now. Check if everything is the way you wanted it to be. Once you are confirmed click “Crate web ACL”.
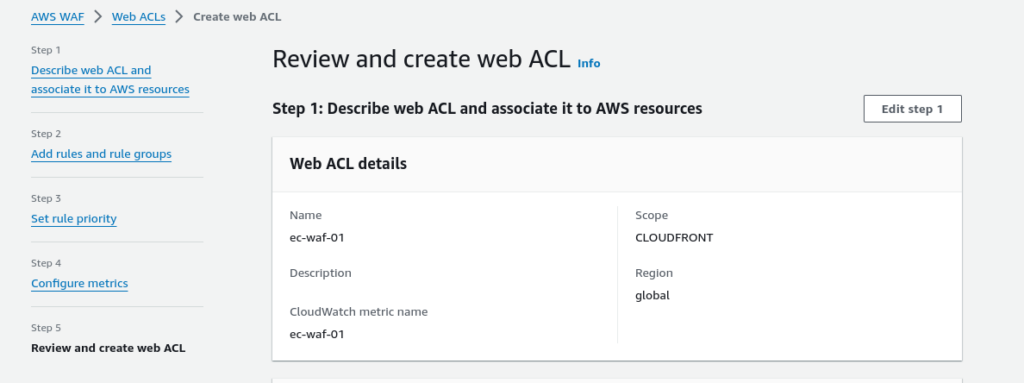
This will take some time, and create the Web ACL.

Now that the Web ACL rule is enabled it’s time to check if it’s working or not.
Validation of Web ACL Rules
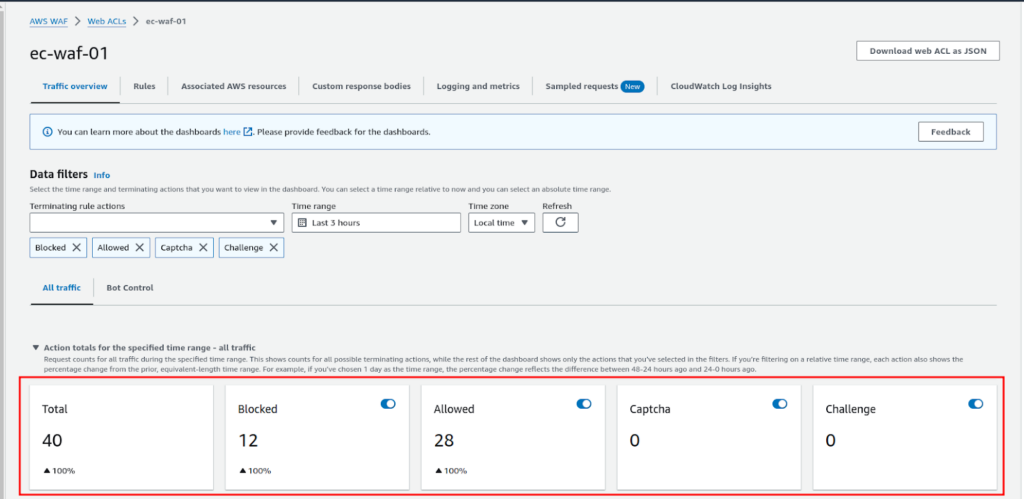
The first thing you can do is check the traffic overview and look at the requests that can only be generated if the Web ACL is working.
Another test you can do is temporarily “Block” the requests that don’t match the AWS bad IP list, so it will block good IP. This way only the bad IP can access the website. As we are not in the AWS bad IP list and won’t be able to access the site. To do that you have to go to the “Rules” section.

Now click on “Edit” in the “Default web ACL action for requests that do not match any rules” section. And select “Block” in “Default action”.

Now try to browse the CloudFront distributor address again and you will see your request is blocked. This indicates that the Web ACL is working effectively.

Once you are done with the checks, change back the “Default action” to “Allow”. So the Web ACL can work as it’s implemented.
Conclusion
AWS WAF is a critical asset in web application security. Successfully deploying and maintaining this service will protect your public-facing web app from various malicious attacks. Additionally, with its managed rules, you can easily defend against a large portion of these attacks.
Elite Cloud is an officially authorized cloud agent of AWS , focusing on helping enterprises to import AWS, optimize accounting and accelerate cloud deployment.
We help businesses pay in Taiwan dollars, issue local invoices, and enjoy exclusive rates and technical support. Whether you are moving to the cloud for the first time or upgrading your architecture, Elite Cloud can provide one-on-one consulting services.

