Google Cloud Artifact Registry is a fully managed service that provides a secure and scalable way to store and manage various software artifacts, including containers, programming language packages, and OS packages. While it is commonly used for Docker images, it also supports private repositories for language-specific dependencies such as Python, npm, Maven, and Go modules.
For this guide, we will focus on Python package management, demonstrating how to set up a private Python repository, publish a package, and retrieve it for use. Attach screenshots after executing each command for documentation and reference.
Prerequisites
Before you begin, ensure you have:
- A Google Cloud account with billing enabled
- The gcloud CLI installed and authenticated (gcloud auth login)

- A Google Cloud project set (gcloud config set project PROJECT_ID)

- Python and pip installed on your system
- The twine package installed (sudo apt install twine)

(Note: Installing the Google Cloud SDK was covered in our previous article, so we will not go over it here.)
Enabling Google Cloud Artifact Registry API
Before using Artifact Registry, enable its API by running: `gcloud services enable artifactregistry.googleapis.com`

This allows Artifact Registry to store and manage your Python packages.
Step 2: Create a Python Repository
To store Python packages, create an Artifact Registry repository: `gcloud artifacts repositories create my-python-repo –repository-format=python –location=us-central1`

- Replace my-python-repo with your repository name.
- Replace us-central1 with your preferred region (choose one close to your development team).
Step 3: Configure pip and Twine for Authentication
To interact with Artifact Registry, configure pip and twine authentication. First start with by generating an Access Token: `gcloud auth print-access-token`

Then create or edit the ~/.pypirc file:“`
[distutils]
index-servers =
[google]
repository = https://us-central1-python.pkg.dev/<PROJECT_ID>/my-python-repo/
username = oauth2accesstoken
password = <YOUR_ACCESS_TOKEN>
“`

- Replace <PROJECT_ID> with your Google Cloud project ID.
- Replace us-central1 with your region.
- Replace <YOUR_ACCESS_TOKEN> with the access token obtained earlier.
Step 4: Create a Sample Python Package
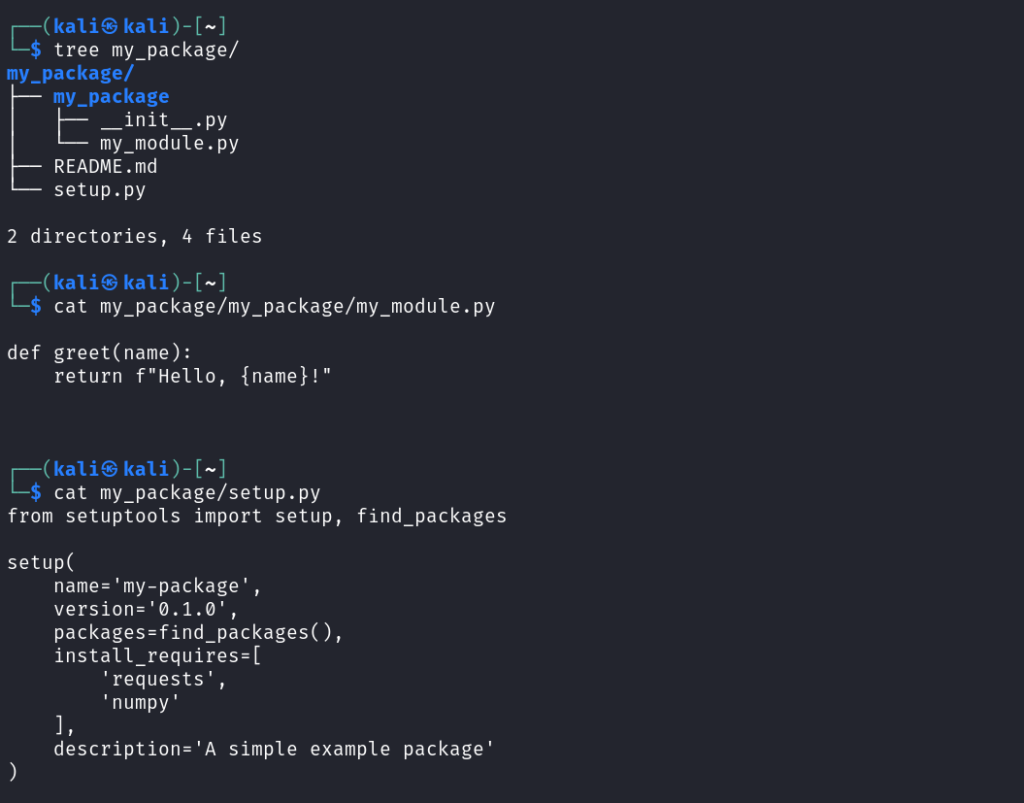
Create a directory structure for a simple Python package:
“`
my_package/
├── my_package/
│ ├── __init__.py
│ └── my_module.py
├── setup.py
└── README.md
“`
File Contents:
- my_package/init.py (This file can be empty.)
- my_package/my_module.py
“`
def greet(name):
return f”Hello, {name}!”
“`
- setup.py
“`
from setuptools import setup, find_packages
setup(
name=’my-package’,
version=’0.1.0′,
packages=find_packages(),
install_requires=[
‘requests’,
‘numpy’
],
description=’A simple example package’
)
“`
- README.md(Add a description of your package.)
Step 5: Build the Python Package
Navigate to the package directory and run: `python setup.py sdist bdist_wheel`
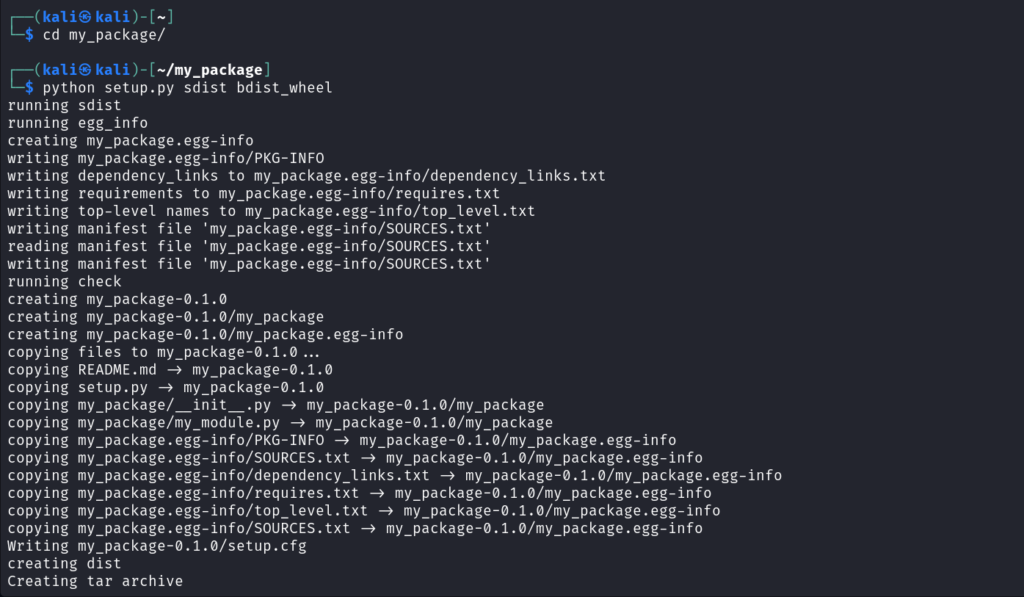
This will create a dist/ directory containing the .tar.gz and .whl package files.

Step 6: Upload the Package to Google Cloud Artifact Registry
Use twine to publish the package: `twine upload –repository google dist/*`

If you get an error like “InvalidDistribution: Cannot find file (or expand pattern): ‘dist/*’”, ensure you have built the package correctly in Step 5.
Step 7: Install the Package from Google Cloud Artifact Registry
Now, install your package using pip: `pip install –index-url https://us-central1-python.pkg.dev/<PROJECT_ID>/my-python-repo/simple/ my-package`

- Replace <PROJECT_ID> with your Google Cloud project ID.
- Replace us-central1 with your repository’s region.
- Username: oauth2accesstoken
- Password: Use the access token generated earlier.
- Use –trusted-host us-central1-python.pkg.dev if you face SSL verification issues.
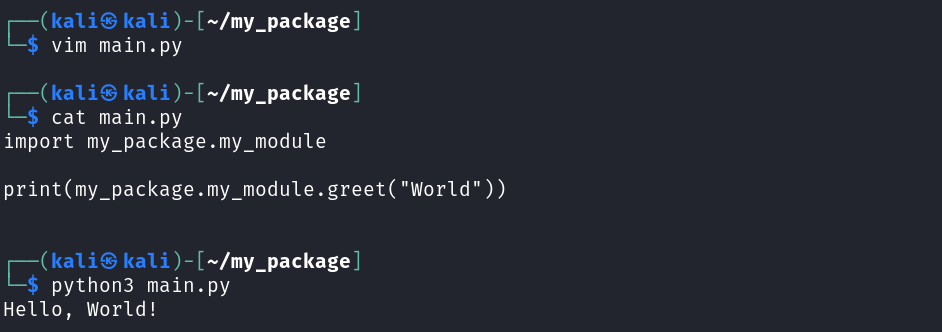
Step 8: Use the Installed Package
Now, you can use your package in Python:
“`
import my_package.my_module
print(my_package.my_module.greet(“World”)) # Output: Hello, World!
“`
Need expert help with Google Cloud Artifact Registry?
As a Google Cloud Premier Partner, Elite Cloud provides expert consulting on:
- Cost optimization – Reduce artifact storage expenses with efficient repository management and retention policies.
- Security best practices – Implement IAM controls and encryption for secure package management.
- Performance tuning – Optimize artifact retrieval and caching for faster CI/CD pipelines.
📞 Talk to an Expert Now and streamline your artifact management strategy!
Final Takeaway
In this guide we walked through the end-to-end process of creating, storing, and using a Python package in Artifact Registry.
Google Cloud Artifact Registry simplifies storing and managing programming language packages, enabling secure and scalable distribution.
FAQ
What is Google Cloud Artifact Registry?
Google Cloud Artifact Registry is a tool for managing packages. It handles container images, language packages, and OS packages in one place. It makes CI/CD pipelines smoother, keeps your artifacts safe, and makes managing dependencies easier.
How does Artifact Registry differ from Container Registry?
Artifact Registry is an upgrade to Google’s Container Registry. It supports more artifact types and has better access controls. It also works well with other Google Cloud services, making it more versatile.
What artifact types can I manage with Google Cloud Artifact Registry?
You can manage many types of artifacts with Artifact Registry. This includes Docker containers, npm packages, Maven artifacts, Python packages, and OS packages like Debian and RPM. You can also manage generic artifacts in one repository.
What are the benefits of using Artifact Registry for CI/CD workflows?
Artifact Registry makes CI/CD pipelines more efficient. It offers secure storage, vulnerability scanning, and access control. This ensures your development and deployment are safe and smooth.

