What is an Elastic IP?
An Elastic IP (EIP) is a static IPv4 address designed for dynamic cloud computing. Offered by Amazon Web Services (AWS), it is associated with your AWS account and not a specific instance. Consequently, this allows you to quickly shift the IP to another instance in your account, thereby masking any instance or software failures.
Benefits of Using Elastic IPs
Elastic IPs simplify managing instance connectivity. Here are their primary advantages:
- Flexibility: You can swiftly remap the IP to another instance if there’s a failure or during maintenance, thus minimizing downtime.
- Control: You maintain the IP address even when you stop and restart your instance.
- Consistency: Moreover, Elastic-IPs provide stable, predictable IP addresses. They can be whitelisted in other systems, which is especially useful for applications requiring static IPs for DNS or data transfers.
Prerequisites
You should have the following before continuing with this hands-on article.
- AWS Account Setup: You must have an active AWS account. If you do not have one, you can sign up at the AWS website.
- Existing EC2 Instance: Additionally, you should have at least one running EC2 instance to which the Elastic-IP will be assigned. If you need to create a new instance. You can do so from the EC2 dashboard by selecting the appropriate AMI and instance type. And configuring the instance settings according to your needs. Or you can follow this hands-on guide.
Creating an Elastic IP Address
Now let’s create an Elastic-IP. Firstly, navigate to your EC2 Dashboard. Under “Network & Security,” select “Elastic IPs.”

There are no Elastic-IPs created yet. Click on “Allocate Elastic IP Address” to create one. Now click on the “Allocate Elastic IP Address” to create an Elastic-IP.

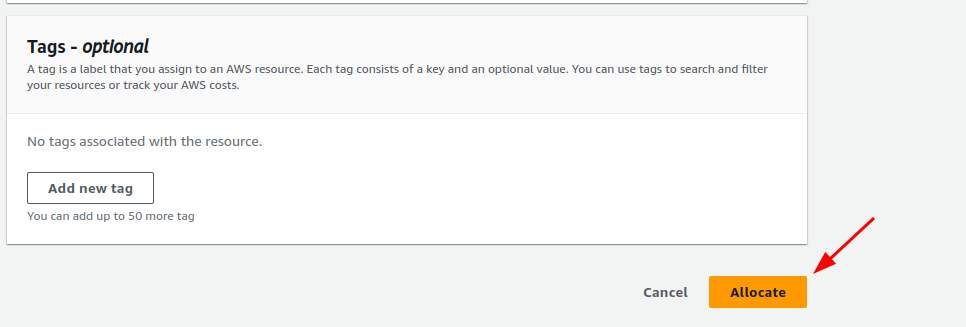
Keep everything default and click on “Allocate”.

This will give you a new Elastic-IP.

Associating the Elastic IP with an EC2 Instance
Now that you’ve created an Elastic-IP. You can assign this IP to an EC2 instance. Let’s associate this Elastic-IP with an EC2 Instance.

Click on the Elastic-IP you just created and click on “Associate Elastic IP Address”.
Here in the resource type choose “Instance”.

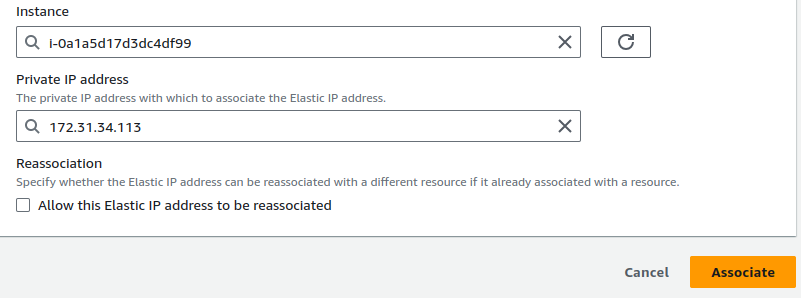
Next, select the instance and Private IP where you want to associate this Elastic-IP and click “Associate”.

Without an Elastic-IP, your EC2 instance would receive a new IP address every time you stop and restart it.

However, with an Elastic-IP, the address remains unchanged. Moreover, you can use this Elastic-IP to replace failed resources seamlessly. All you have to do is associate the same IP with a different instance or NET interface.
After you have successfully associated the IP with the EC2 instance you will be able to see the Elastic-IP address filled, and the Public IPv4 address is also the same.

Disassociating and Deleting the Elastic IP
Finally, if you are no longer in need of that IP. You can disassociate and delete the Elastic-IP address. This way you won’t be charged for the IP reservation. To disassociate an Elastic-IP click on the Elastic-IP from “Elastic-IP addresses” and click on “Disassociate Elastic IP address”.

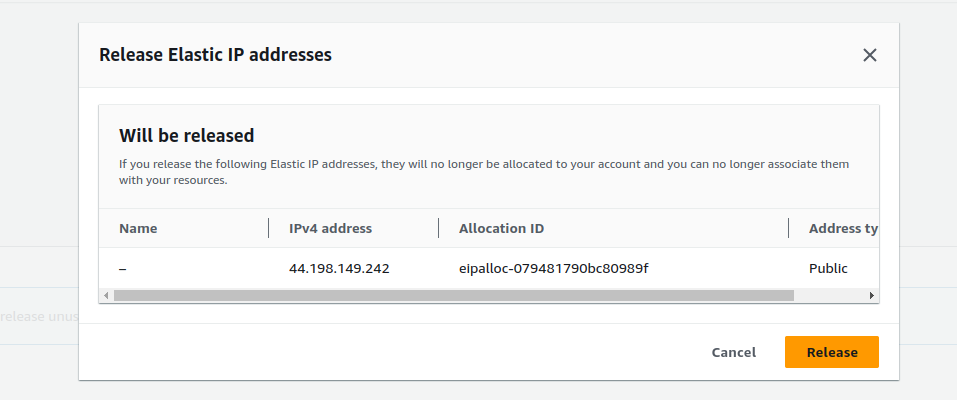
And confirm it. Next, to release the IP, click on “Release Elastic IP addresses” after selecting it.

And also confirm the release.

This will release the Elastic-IP address and you won’t be charged for this.
Thanks for reading.
Elite Cloud is an officially authorized AWS cloud agent , focusing on helping enterprises introduce AWS services, reduce cloud costs, optimize accounting management and provide technical support.
Whether you’re exploring AWS EC2 for the first time or aiming to enhance your cloud environment, Elite Cloud offers localized consulting, Taiwan invoice issuance, exclusive account benefits, and technical support specific to your industry needs.


